Cooking Articles
Beyond Boiling: How to Cook Pasta Like a Pro
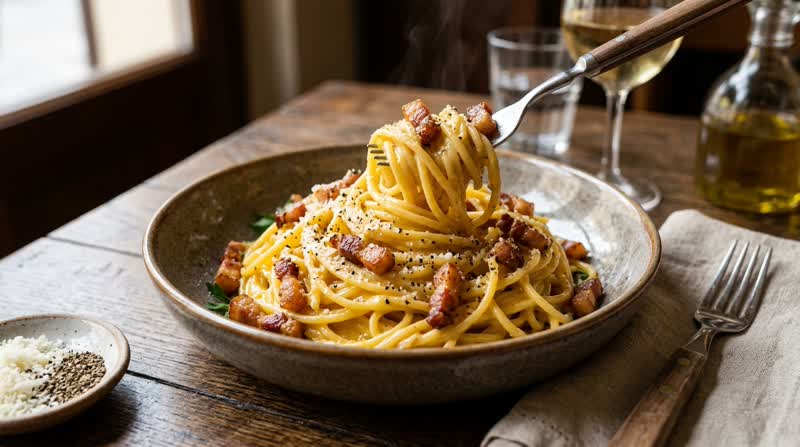
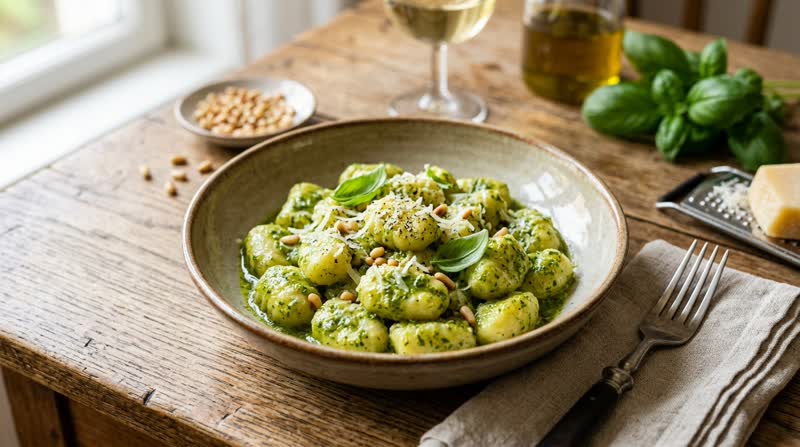
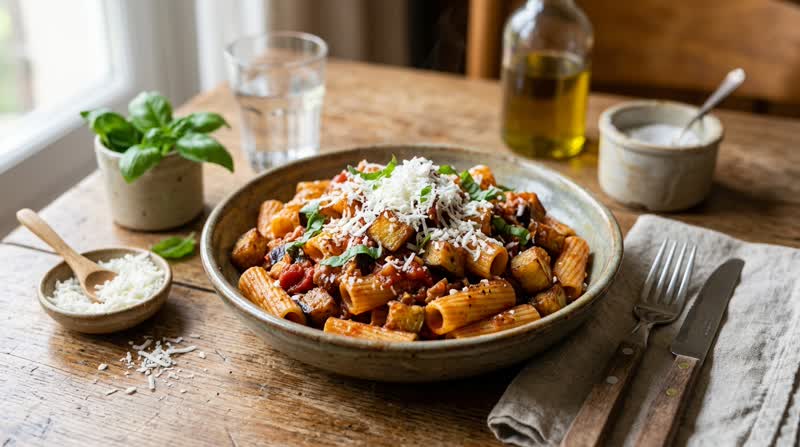
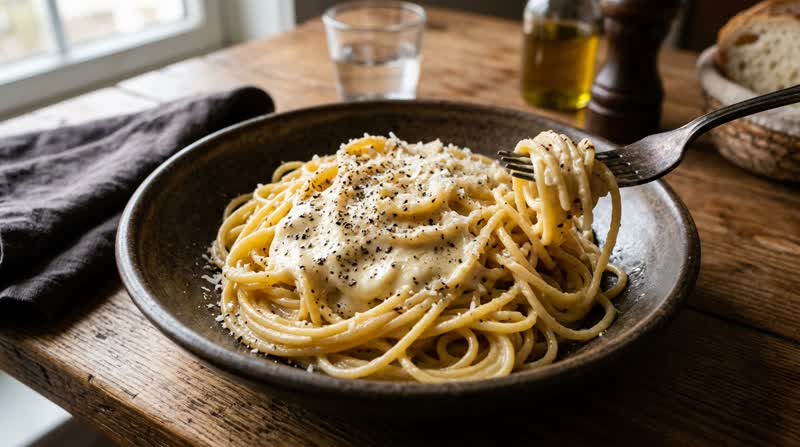
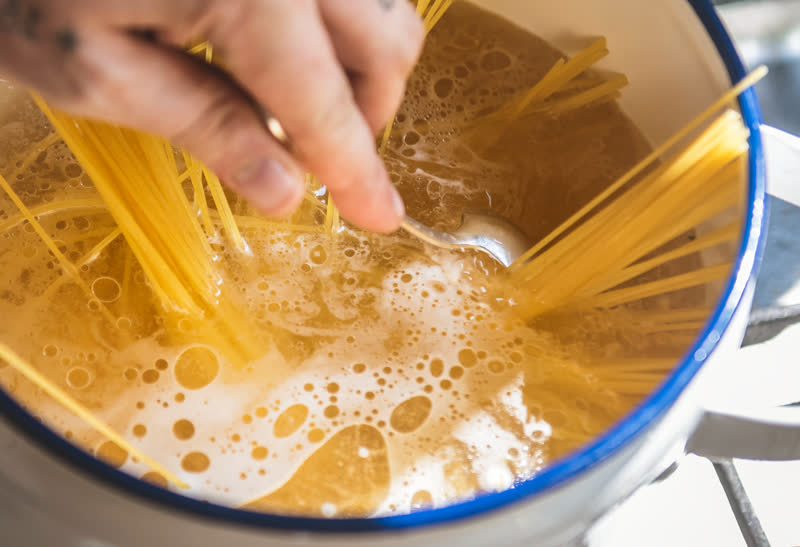
Pasta is often thought of as one of the simplest dishes in the culinary world, but anyone who has ended up with clumped, overcooked noodles knows that cooking pasta well requires technique and attention. Achieving perfect pasta isn't about following a timer on the box; it's about understanding the science of water, salt, heat, and timing, and learning how to treat pasta as more than just a filler on your plate. The first step to perfect pasta begins with the water. A common mistake is using too little water, which causes the noodles to stick together and cook unevenly. A good rule of thumb is to use about one gallon of water for every pound of pasta. This allows the noodles to move freely, cook evenly, and prevents the dreaded sticky mess. Once the water is boiling, it's essential to salt it generously. Salt isn't just about seasoning; it enhances the pasta's flavor from the inside out. The water should taste like the sea, giving the noodles a foundational seasoning that can’t be added later. When it comes to cooking, timing is critical. Pasta should be cooked to “al dente,” which means it has a slight resistance to the bite. Overcooked pasta becomes mushy and loses its ability to hold onto sauces properly. The best method is to start tasting the pasta a couple of minutes before the time suggested on the package. This ensures you catch that perfect texture before it passes you by. Equally important is saving a small cup of the starchy cooking water before draining the pasta. This water is a secret ingredient used by professional chefs to bring sauces together and make them cling beautifully to the noodles. Draining the pasta is only the halfway point; the magic happens when you finish cooking it in the sauce. Instead of dumping the pasta and sauce separately, toss the noodles directly into the pan with the sauce and add a splash of the reserved pasta water. The starches in the water act as a binder, helping the sauce adhere to every strand, creating a cohesive, flavorful dish. This simple step transforms ordinary pasta into a restaurant-quality meal. One tip that many home cooks overlook is never to rinse the pasta. Rinsing washes away the flavorful starch that makes your sauce cling, resulting in a watery, bland dish. Similarly, avoid adding oil to the water; while it prevents sticking, it also creates a slippery coating that prevents sauces from binding to the pasta properly. Finally, remember that pasta is incredibly versatile, and experimenting with different shapes and types can elevate your meals. Long strands like spaghetti and linguine pair well with lighter, oil-based sauces, while short, ridged pastas like penne or rigatoni hold chunky sauces exceptionally well. Fresh pasta behaves differently than dried, cooking much faster and benefiting from a gentler approach, while gluten-free pasta often requires precise timing to prevent falling apart. Cooking pasta like a pro isn't about complicated techniques or exotic ingredients. It's about understanding the relationship between water, salt, timing, and finishing techniques, and respecting each step along the way. By paying attention to these details, even a humble bowl of pasta can transform into a dish that tastes intentional, balanced, and utterly satisfying.
How to Make Any Salad Actually Delicious
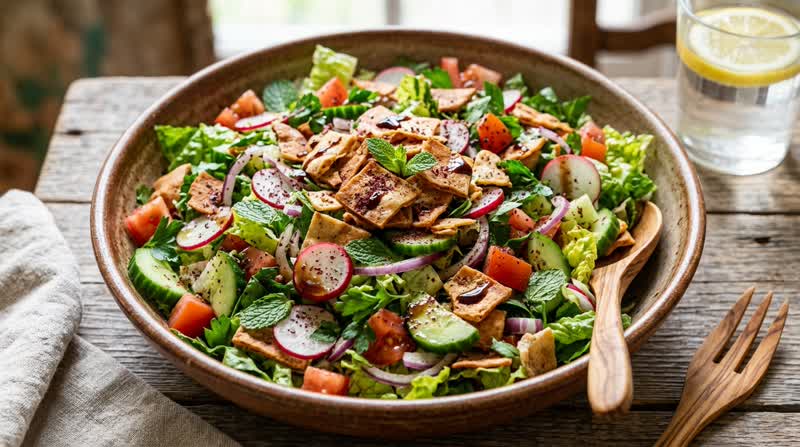
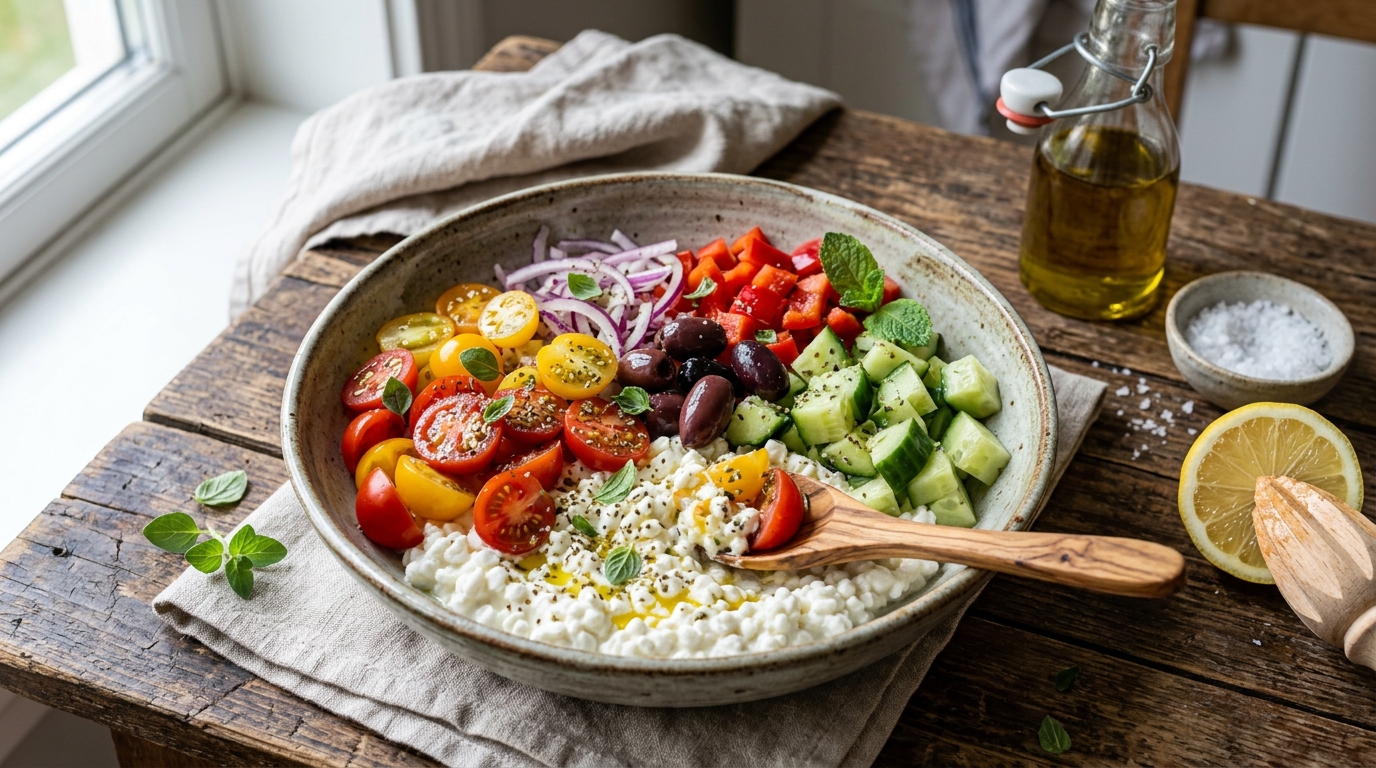
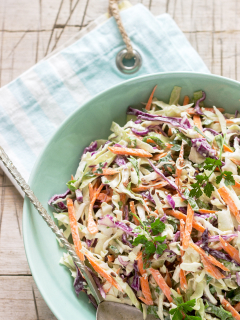
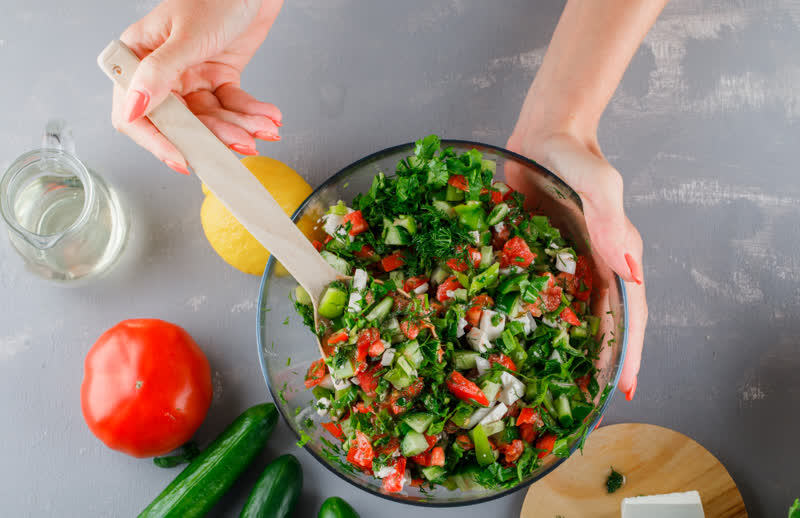
Salads often suffer from a bad reputation. Too many people associate them with bland lettuce, watery tomatoes, and a forgettable dressing poured on top as an afterthought. But a truly great salad can be one of the most satisfying and dynamic dishes you can prepare. The difference lies not in complicated recipes, but in understanding how to build balance, contrast, and flavor in every bite. At the heart of any good salad is a thoughtful combination of textures. A bowl filled with only soft greens quickly becomes monotonous, but when you introduce contrast, everything changes. Crisp vegetables like cucumbers or radishes bring freshness, while toasted nuts or seeds add crunch and depth. Creamy elements such as avocado, cheese, or a well-balanced dressing help tie everything together. The goal is to create a mix where every bite feels slightly different, yet still harmonious. Equally important is the dressing, which should never be treated as an afterthought. A well-made dressing doesn’t just coat the ingredients — it transforms them. The foundation of most dressings is a balance between fat and acid, typically oil and vinegar or citrus juice. When these elements are in harmony, the dressing enhances the natural flavors of the vegetables instead of overpowering them. Adding a touch of mustard can help emulsify the mixture, while a bit of honey or maple syrup can soften sharp acidity and create a more rounded flavor. The key is to taste and adjust, aiming for a balance that feels bright but not harsh. Seasoning plays a surprisingly important role in salads. Many people only season the dressing, but the ingredients themselves benefit from a light touch of salt as well. Proper seasoning draws out the natural flavors of vegetables and prevents the salad from tasting flat. Freshly ground pepper, citrus zest, or even a small splash of vinegar added at the end can elevate the entire dish in subtle but meaningful ways. A great salad also needs substance. Without it, it can feel more like a side dish than a complete meal. Adding protein transforms a salad into something more satisfying and nourishing. Grilled chicken, roasted vegetables, legumes like chickpeas or lentils, or even a soft-boiled egg can provide that extra layer of richness and depth. At the same time, incorporating healthy fats — from olive oil to nuts or cheese — helps carry flavor and creates a more rounded eating experience. Fresh herbs are another element that can completely change the character of a salad. A handful of chopped parsley, basil, mint, or dill can add brightness and complexity that dried spices simply can’t replicate. Herbs should be used generously, almost as greens themselves, rather than just a garnish sprinkled on top. Finally, never underestimate the power of finishing touches. Texture is often what separates a good salad from a great one, and adding a final crunchy element can make all the difference. Homemade croutons, toasted breadcrumbs, seeds, or nuts provide that satisfying contrast that keeps each bite interesting. Even something as simple as a squeeze of lemon juice or a drizzle of high-quality olive oil just before serving can bring everything into focus. Making a delicious salad isn’t about following strict rules, but about understanding how different elements interact. When you combine texture, balance your dressing, season thoughtfully, and finish with intention, even the simplest ingredients can become something memorable. In the end, a great salad doesn’t feel like a compromise — it feels like a dish you genuinely want to eat.
Baking Bread at Home: A Beginner’s Guide
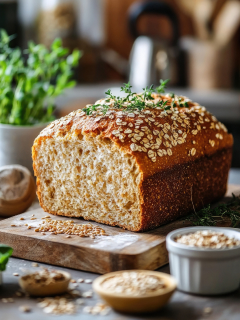
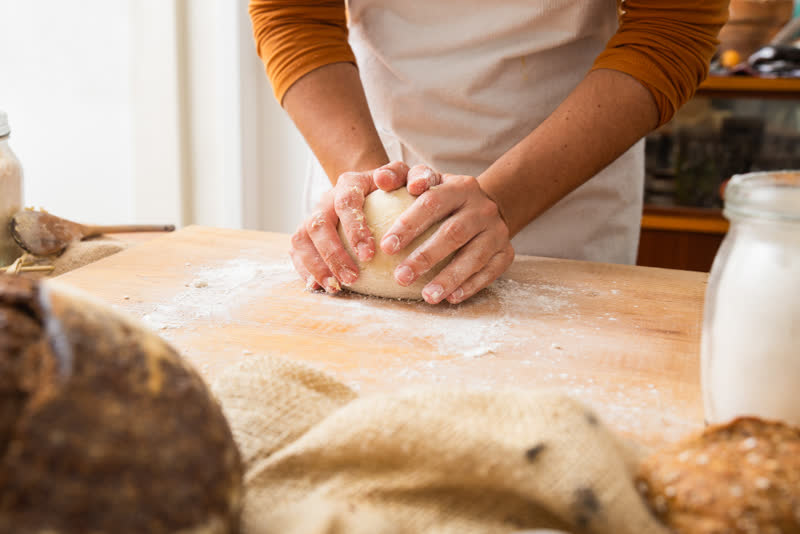
There is something deeply satisfying about baking bread at home. The process is simple on the surface—just flour, water, salt, and yeast—but the transformation that happens along the way feels almost magical. For beginners, bread baking can seem intimidating, filled with unfamiliar terms and techniques, but at its core, it’s about understanding a few key principles and learning to trust the process. Every loaf of bread begins with its essential ingredients, and each plays a specific role. Flour provides structure through gluten, a network of proteins that gives bread its shape and chew. Water hydrates the flour and activates gluten development, while also influencing the texture of the final loaf. Salt is often underestimated, but it not only enhances flavor—it also controls fermentation and strengthens the dough. Yeast, whether fresh, dry, or natural sourdough starter, is what brings the dough to life by producing gas that makes the bread rise. Once the ingredients are combined, the next step is developing the dough. This is where kneading comes in. Kneading aligns and strengthens the gluten network, allowing the dough to trap air and expand properly. For many beginners, kneading can feel like hard work, but it doesn’t have to be complicated. A simple stretch-and-fold method can achieve excellent results with less effort, especially for wetter doughs. Over time, you’ll start to recognize when the dough is ready—it becomes smoother, more elastic, and slightly tacky to the touch.After kneading comes one of the most important stages: fermentation. This is when the dough rests and rises, and it’s where much of the flavor develops. While it may be tempting to rush this step, patience is key. Slower fermentation, especially at cooler temperatures, allows more complex flavors to form and improves the overall texture of the bread. During this stage, the dough will gradually expand as yeast produces carbon dioxide, creating the airy structure inside the loaf. Shaping the dough is another step that often gets overlooked, but it plays a crucial role in the final result. Proper shaping creates surface tension, which helps the bread hold its form and rise upward instead of spreading out. Whether you’re making a round loaf or a long one, the goal is to gently guide the dough into shape without deflating all the air you’ve worked to build. When it comes time to bake, heat management becomes essential. A hot oven is necessary to give the bread an initial burst of rise, often called “oven spring.” Steam is equally important in the early stages of baking because it keeps the crust soft, allowing the bread to expand fully before it sets. This is why many bakers use a tray of water in the oven or bake their bread in a covered pot, such as a Dutch oven, to trap steam. As the bread continues to bake, the crust develops its color and texture, turning golden brown and crisp. Knowing when your bread is done can take a bit of practice. A well-baked loaf should sound hollow when tapped on the bottom, and it should have a deep, even color. Using a thermometer can also help, as most breads are fully baked when their internal temperature reaches around 90–95°C (195–205°F). Once out of the oven, it’s important to let the bread cool before slicing. Although it’s tempting to cut into it right away, the interior is still setting, and cutting too soon can result in a gummy texture. Baking bread at home is not about perfection; it’s about learning through experience. Each loaf teaches you something new—how the dough feels, how it responds to time and temperature, and how small adjustments can make a big difference. With practice, what once seemed complicated becomes intuitive, and the process itself becomes just as rewarding as the final result. In the end, homemade bread is more than just food—it’s a craft, a ritual, and a simple pleasure that never loses its appeal.
Roasting Meat: A Guide to Perfect Results
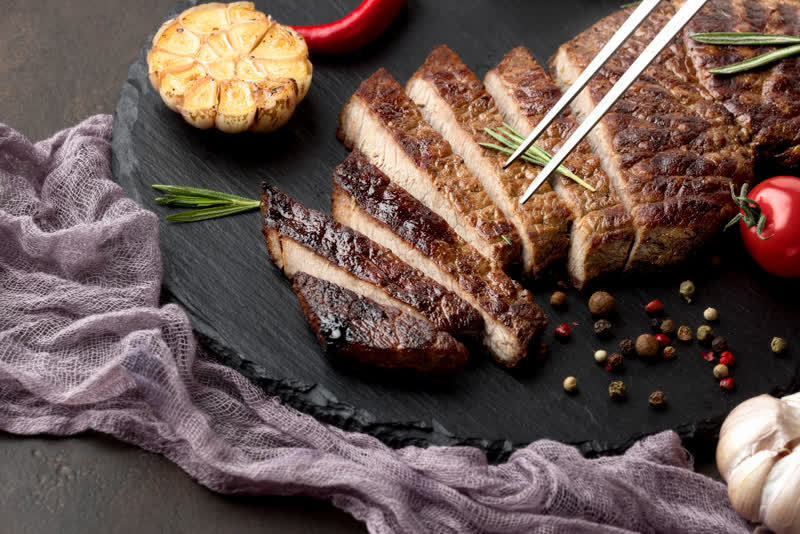
Roasting meat is often seen as one of the simplest cooking methods: place it in the oven, wait, and serve. But in reality, achieving perfectly roasted meat—tender on the inside, deeply flavorful, and beautifully browned on the outside—requires a deeper understanding of technique and timing. The difference between dry, unevenly cooked meat and a truly exceptional roast comes down to a few key principles that professional cooks rely on every day. One of the most important, yet frequently overlooked, steps in roasting is seasoning in advance. Salting meat just before it goes into the oven will add some flavor, but it doesn’t have the same effect as salting it hours ahead of time. This process, often called dry brining, allows the salt to penetrate the meat more deeply. As it does, it helps the protein retain moisture during cooking and enhances the overall flavor. Given enough time—anywhere from a few hours to overnight—the result is meat that is not only better seasoned but also noticeably juicier. Temperature control is another critical factor. Many people assume roasting simply means cooking at a high temperature, but a more nuanced approach yields better results. Starting at a moderate temperature allows the meat to cook evenly, ensuring that the interior reaches the desired doneness without overcooking the outer layers. Toward the end of cooking, increasing the heat helps develop a rich, caramelized crust. This two-stage approach creates a balance between tenderness and texture that is difficult to achieve otherwise. Of course, none of this matters without an accurate way to measure doneness. Relying on cooking times alone can be misleading, as ovens vary and different cuts of meat behave differently. A meat thermometer is one of the most valuable tools in the kitchen, providing precise information about the internal temperature. Whether you’re roasting chicken, beef, or pork, knowing the exact temperature ensures consistency and prevents overcooking. It removes guesswork and replaces it with confidence. Another step that can make or break a roast is resting the meat after it comes out of the oven. It may seem like a small detail, but it has a significant impact on the final result. During cooking, the juices inside the meat are pushed toward the center. If you cut into it immediately, those juices will escape, leaving the meat dry. Allowing it to rest for several minutes gives the juices time to redistribute, resulting in a more succulent and flavorful bite. Beyond these fundamentals, small details can elevate your roasting even further. Using a rack allows hot air to circulate around the meat, promoting even cooking and better browning. Adding aromatics such as garlic, herbs, and onions to the roasting pan infuses the meat with subtle layers of flavor. Basting, while not always necessary, can enhance the surface and contribute to a richer finish, especially for larger cuts. Ultimately, roasting meat is about patience and attention rather than complexity. It’s a method that rewards those who take the time to understand how heat, seasoning, and structure interact. When done properly, roasting transforms a simple cut of meat into something deeply satisfying—crispy on the outside, juicy on the inside, and full of rich, developed flavor. It’s not just a cooking technique; it’s one of the most reliable ways to create a meal that feels both comforting and impressive at the same time.
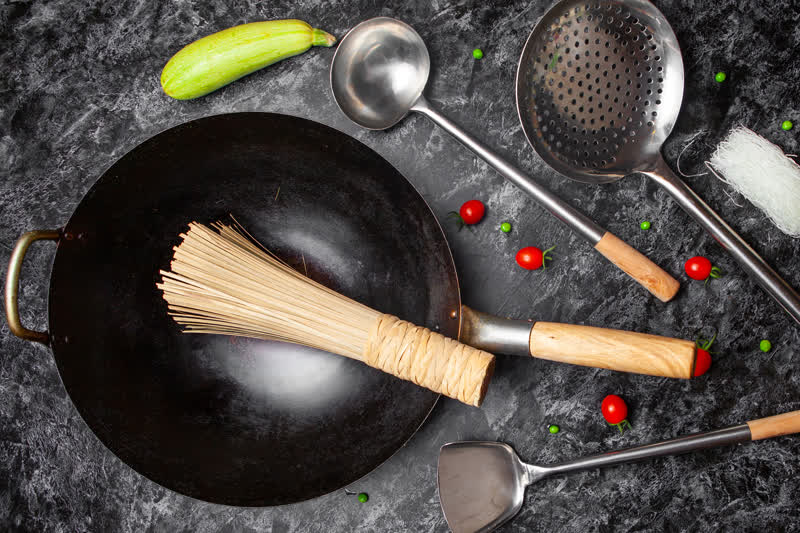
5 Kitchen Tools Worth Investing In
Every cook, whether a beginner or seasoned home chef, knows that the right tools can make a huge difference in the kitchen. While it’s easy to get overwhelmed by gadgets and gizmos, some tools are worth every penny because they save time, improve results, and make cooking genuinely enjoyable. Here are five essential kitchen tools that can elevate your cooking experience. 1. A High-Quality Chef’s Knife If there is one tool that every cook should invest in, it’s a good chef’s knife. A sharp, well-balanced knife doesn’t just make chopping easier—it’s safer and more precise. With a proper knife, slicing vegetables, dicing onions, or cutting meat becomes faster and more controlled, reducing fatigue and frustration. Look for a knife that feels comfortable in your hand, maintains a sharp edge, and is made from durable materials like stainless steel. Over time, learning to sharpen and care for your knife will pay off with consistent, reliable performance. 2. A Heavy-Bottomed Skillet or Frying Pan A versatile, heavy-bottomed skillet, ideally cast iron or stainless steel, is a cornerstone of any kitchen. It retains heat evenly, allowing for excellent searing, browning, and sautéing. Whether you’re cooking a steak, roasting vegetables, or making a simple stir-fry, a quality pan ensures that heat is distributed properly, giving your food consistent flavor and texture. Unlike non-stick pans, a sturdy cast iron skillet can last a lifetime if properly maintained, making it a true investment. 3. A Digital Kitchen Thermometer One of the most common mistakes in cooking is guessing doneness, especially with meat, poultry, or baked goods. A digital kitchen thermometer eliminates uncertainty, providing precise internal temperatures. This ensures your chicken is fully cooked, your steak hits the perfect medium-rare, and your bread is baked through. Beyond meat, a thermometer can also help with candy, sugar syrups, and fermenting projects. It may seem like a small tool, but its impact on consistency and confidence in the kitchen is enormous. 4. A Good Cutting Board A reliable cutting board is more than a surface for chopping; it protects your counters and preserves your knives. High-quality boards, whether wooden or composite, are gentle on blades while sturdy enough to withstand daily use. Wooden boards, in particular, have natural antibacterial properties and develop a patina over time that actually improves their performance. Investing in a couple of boards—one for raw proteins and another for vegetables—also helps prevent cross-contamination and keeps your workflow organized. 5. A Microplane or Fine Grater Small tools can make a surprisingly big difference, and a microplane is one of the most versatile. Perfect for zesting citrus, grating hard cheeses, garlic, ginger, or even nutmeg, a microplane adds flavor and texture in ways that pre-grated ingredients cannot match. It allows for fine, uniform results with minimal effort, and it’s compact enough to store easily. This simple tool can elevate sauces, dressings, and desserts alike, making it one of the most underrated essentials in the kitchen.
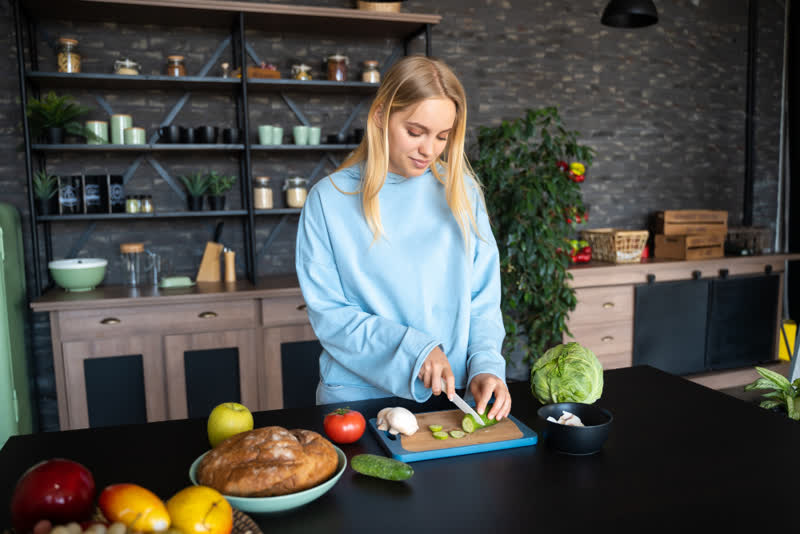
10 Essential Kitchen Tips for Better Cooking at Home
Cooking at home can be both enjoyable and rewarding, but it often comes with challenges - especially if you’re still building confidence in the kitchen. Whether you’re a beginner or someone looking to refine your skills, a few practical tips can make a big difference in the quality of your meals and your overall cooking experience. First, preparation is key. Before you even turn on the stove, make sure you read the entire recipe and gather all your ingredients. This process, often called “mise en place,” helps you stay organized and prevents mistakes like missing ingredients or overcooking something while you scramble to find what you need. Second, invest in a few good-quality tools. You don’t need a fully stocked professional kitchen, but having a sharp knife, a sturdy cutting board, and reliable pans can greatly improve your efficiency and safety. A dull knife, for example, is actually more dangerous because it requires more force and can slip easily. Another important tip is to season your food properly. Salt is essential for bringing out flavors, but it’s important to use it gradually. Taste your food as you cook and adjust the seasoning step by step. This approach ensures balanced flavors and prevents over-salting. Temperature control is also crucial. Many cooking mistakes happen because the heat is too high or too low. For example, cooking meat on very high heat can burn the outside while leaving the inside undercooked. Learning how to control heat - whether simmering, sautéing, or searing - will greatly improve your results. Don’t overcrowd the pan. When too many ingredients are packed into one pan, they release moisture and start steaming instead of browning. This can affect both the texture and flavor of your dish. Cook in batches if necessary to achieve better results. Using fresh ingredients can elevate any dish. Fresh herbs, vegetables, and high-quality proteins often have more flavor than processed or older ingredients. When possible, choose seasonal produce for the best taste and value. Cleaning as you go is another habit that makes cooking more enjoyable. Instead of leaving a big mess for later, wash utensils and wipe surfaces while your food is cooking. This keeps your workspace organized and reduces stress after the meal. Experimentation is also part of becoming a better cook. Don’t be afraid to try new recipes or adjust ingredients based on your preferences. Cooking is both a science and an art, and personal creativity plays a big role. Finally, be patient with yourself. Mistakes are part of the learning process. Even experienced cooks occasionally burn a dish or misjudge a recipe. The key is to learn from those moments and keep improving. By applying these simple but effective kitchen tips, you can build confidence, improve your skills, and enjoy the process of cooking more than ever. Over time, these habits will become second nature, turning everyday meals into something truly special.

Baking Mistakes Everyone Makes (and How to Fix Them)
Baking is often seen as a precise, almost scientific art - where a teaspoon too much flour or a minute too long in the oven can mean the difference between success and failure. Even experienced bakers encounter mistakes, but the good news is that most are easily fixed once you know what to look for. Understanding these common pitfalls not only saves time and ingredients but also helps you bake with confidence. 1. Using the Wrong Measuring Technique One of the most frequent baking mistakes is inaccurate measuring, especially with flour. Scooping directly from the bag can compress the flour, leading to dense, heavy cakes or cookies. The better method is to spoon flour into your measuring cup and level it off with a flat edge. For even more precision, invest in a digital kitchen scale - baking by weight ensures consistency and eliminates guesswork. 2. Ignoring Ingredient Temperature Butter, eggs, and milk all behave differently depending on their temperature. Many recipes call for room-temperature butter or eggs because they blend more evenly, creating a smoother batter and better texture. Cold ingredients can result in uneven mixing, dense cakes, or curdled dough. A simple fix is to plan ahead: take butter and eggs out of the fridge 30–60 minutes before baking. 3. Overmixing the Batter While thorough mixing is essential in some recipes, overmixing can ruin baked goods. Overworked dough or batter develops too much gluten, resulting in tough cakes or chewy cookies instead of tender, fluffy ones. Mix just until ingredients are combined, and fold in delicate elements like whipped egg whites gently to maintain airiness. 4. Incorrect Oven Temperature Another common mistake is assuming your oven’s dial is accurate. Many ovens run hotter or cooler than indicated, leading to burned edges or undercooked centers. Using an oven thermometer is an inexpensive way to check your oven’s true temperature. Additionally, placing baked goods in the center of the oven promotes even cooking, while avoiding hot spots near the sides. 5. Opening the Oven Too Early It’s tempting to peek at your cake or bread, especially when it smells amazing. But opening the oven door too soon can cause a sudden drop in temperature, making cakes collapse and breads sink. Resist the urge and wait until the recommended minimum baking time has passed, then check for doneness using a toothpick or thermometer. 6. Skipping the Cooling Process Removing baked goods from pans too early or cutting into them immediately after baking can be disastrous. Cakes, brownies, and breads continue to set as they cool, and slicing too soon can lead to crumbling or gummy textures. Letting baked goods cool properly—on a wire rack when possible—ensures the structure is stable and the flavors have developed fully. 7. Not Adjusting for Altitude or Humidity Environmental factors can impact your results. High altitude can make baked goods rise too quickly, while high humidity can make flour absorb more moisture. If you live in an area with extreme conditions, small adjustments in flour, liquid, or baking time can make all the difference. Experimenting and noting your results helps you bake consistently year-round.
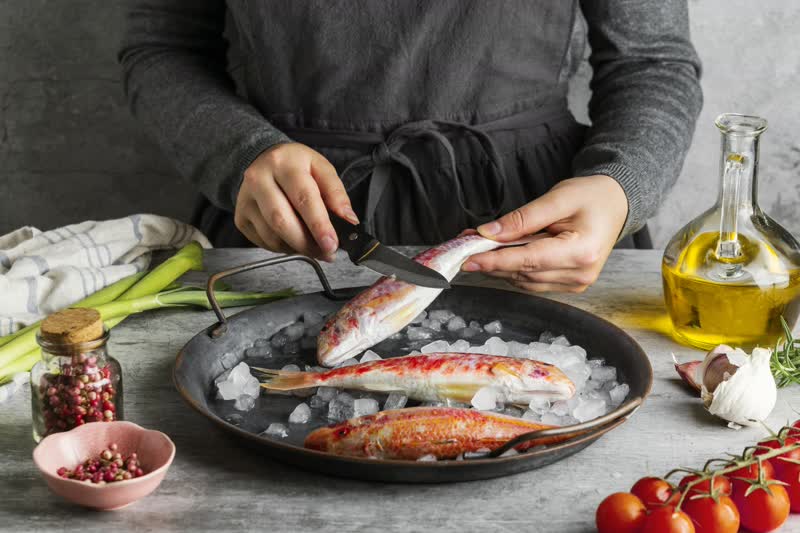
Cooking Fish Without the Fishy Mistakes
Fish is one of the most delicate and flavorful proteins you can cook, but it also has a reputation for being tricky. Overcooked, underseasoned, or mishandled, it can quickly turn into a dry or “fishy” meal. The key to cooking fish well lies in understanding its delicate structure, respecting timing, and using techniques that enhance its natural flavor. 1. Choosing Fresh Fish Matters The first step toward a perfect fish dish begins at the market. Freshness is essential; fish should smell like the sea—not overly strong or pungent—and the flesh should be firm and translucent. For whole fish, clear eyes and bright gills are indicators of quality. When working with fillets, look for a glossy surface and avoid anything that looks dull or mushy. Fresh fish not only tastes better but also cooks more evenly, making your efforts in the kitchen much easier. 2. Don’t Overcook Fish cooks incredibly quickly, and overcooking is perhaps the most common mistake. Unlike meat, fish doesn’t need long exposure to heat; even a minute or two too long can make it dry and tough. A general rule of thumb is to cook fish for about 10 minutes per inch of thickness at medium-high heat. Keep an eye on visual cues: the flesh should turn opaque and flake easily with a fork. Using a digital thermometer can also help—most fish is perfectly done at 50–60°C (120–140°F). 3. Seasoning Is Key Even the freshest fish can taste bland without proper seasoning. Simple salt, pepper, and a squeeze of lemon can bring out the fish’s natural flavors without overpowering them. Herbs like dill, parsley, or tarragon pair wonderfully with most varieties, and a touch of olive oil or butter enhances richness. Avoid masking the fish with heavy sauces unless the recipe is specifically designed for it. The goal is to complement, not compete with, the delicate flavor of the fish. 4. Proper Cooking Techniques The method you choose matters greatly. Pan-searing, baking, steaming, and grilling all have their place, but each requires attention to detail: Pan-Searing: Preheat the pan so the fish develops a crisp, golden crust without sticking. A non-stick or well-oiled stainless steel pan works best. Baking: Baking in parchment (en papillote) or foil traps moisture, keeping fish tender. Steaming: Steaming is gentle and preserves moisture, flavor, and nutrients. Grilling: Oil the grill grates and the fish to prevent sticking, and avoid moving it too soon—let the fish release naturally. 5. Handling Fish Gently Fish flesh is fragile, so handle it with care. Use a wide spatula to flip fillets, and avoid pressing down while cooking. Rough handling can break the flesh, leaving you with a messy presentation and uneven texture. 6. Avoiding the “Fishy” Taste A strong, fishy odor usually indicates older fish or improper storage. To minimize this, buy fish the same day you plan to cook it, store it on ice in the fridge, and cook it promptly. Acidic ingredients like lemon or vinegar can also help neutralize any mild fishiness while enhancing flavor. Cooking fish well doesn’t require complicated recipes or exotic ingredients. It’s about respect—respect for the ingredient, the timing, and the technique. By choosing fresh fish, seasoning thoughtfully, monitoring cooking times, and using gentle methods, you can transform a potentially tricky protein into a delicious centerpiece. With these tips in mind, fish can become one of your easiest and most rewarding meals to prepare, bursting with flavor and cooked to perfection every time.
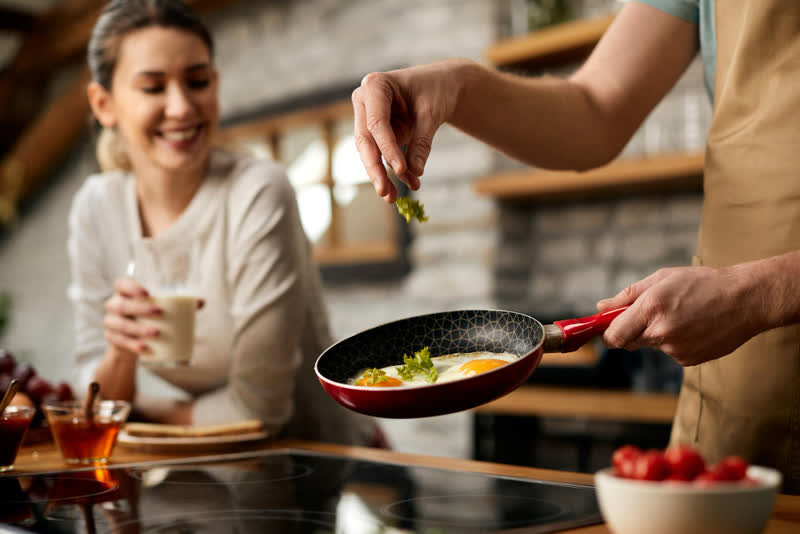
How to Master the Art of Frying Without Making a Mess
Frying is one of the most popular cooking techniques, but it often has a reputation for being messy and difficult. Oil splatters, uneven cooking, and greasy results can make the process frustrating, especially for beginners. However, with the right approach and a few simple techniques, frying can become easy, clean, and highly effective. The first step to successful frying is choosing the right pan. A deep, heavy-bottomed pan helps distribute heat evenly and reduces the chance of oil splashing out. Non-stick or stainless steel pans both work well, as long as they are sturdy and large enough to hold your food without overcrowding. Managing the heat of the oil is very important for successful frying. If the oil is too cold, the food will absorb excess oil and become greasy. If it is too hot, the outside will burn before the inside is fully cooked. A good way to test the oil is to place a small piece of food or a drop of batter into the pan. If it sizzles gently and rises to the surface, the oil is ready. Another important tip is to make sure your ingredients are dry before placing them in hot oil. Water causes oil to splatter, which not only creates a mess but can also be dangerous. Pat meat, vegetables, or other ingredients dry with a paper towel before frying to minimize splashing. Avoid overcrowdibrng the pan. When too much food is added at once, the temperature of the oil drops, leading to uneven cooking and soggy results. Fry in small batches to maintain consistent heat and achieve a crispy texture. Using the right tools can also make a big difference. Tongs, slotted spoons, or a splatter screen help you handle food safely and keep your cooking area clean. A splatter screen, in particular, is a simple tool that can significantly reduce oil mess without affecting airflow. After frying, proper draining is key. Place the cooked food on a plate lined with paper towels to absorb excess oil. This step improves both texture and flavor, making your dish lighter and more enjoyable. Cleaning as you go can further reduce stress. Wipe down surfaces and put away unused ingredients while your food is cooking. This keeps your workspace organized and makes cleanup faster once you are finished. Finally, practice and patience are essential. Frying may seem intimidating at first, but with time, you will develop a better sense of timing and temperature control. By following these simple tips, you can master the art of frying without making a mess and enjoy delicious, perfectly cooked meals at home.
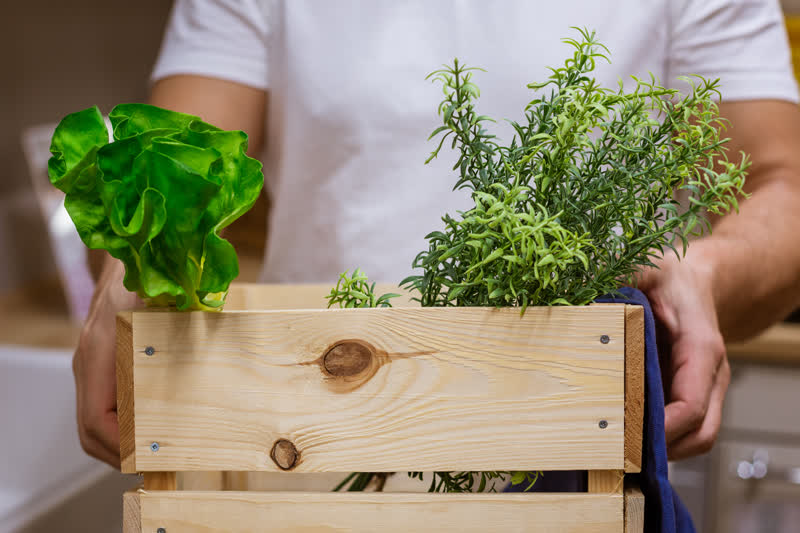
How to Store Fresh Herbs and Vegetables Properly
Fresh herbs and vegetables are the foundation of flavorful, healthy meals, but even the best ingredients can quickly lose their freshness if they’re not stored correctly. Wasting produce not only costs money, but it also robs your dishes of vibrancy and taste. Understanding how to store herbs and vegetables properly can extend their shelf life, preserve nutrients, and make your cooking more efficient. 1. Know Your Vegetables Not all vegetables are created equal when it comes to storage. Some, like potatoes, onions, and garlic, prefer a cool, dark, and dry environment, often outside the refrigerator. Others, such as leafy greens, carrots, and broccoli, need a humid, cold environment to stay crisp. Understanding the natural needs of each type of produce is the first step in keeping them fresh longer. 2. The Right Containers Make a Difference Air circulation is key. For vegetables like lettuce, kale, or spinach, store them in perforated plastic bags or containers lined with a dry paper towel. The paper towel absorbs excess moisture, preventing wilting or sliminess. For herbs, glass jars with water work wonders: trim the stems and place them upright in a small amount of water, then loosely cover with a plastic bag and refrigerate. This method is ideal for parsley, cilantro, and basil. 3. Temperature Matters The refrigerator is a powerful ally when used correctly. Most vegetables last longer in the crisper drawer, which maintains higher humidity than the main fridge shelves. On the other hand, tomatoes lose flavor and develop a mealy texture when refrigerated. Keep them at room temperature, away from direct sunlight, and only refrigerate once they’re fully ripe if you won’t consume them immediately. 4. Avoid Washing Too Early Washing vegetables or herbs too soon can actually shorten their shelf life. Excess moisture encourages mold and spoilage. Instead, rinse produce just before use. If pre-washing is unavoidable, make sure to dry thoroughly before storing and use breathable containers or paper towels to absorb moisture. 5. Use Freezing Wisely Some vegetables and herbs can be frozen to extend usability without sacrificing too much flavor. Spinach, kale, peas, and carrots freeze well after blanching, which helps preserve color, texture, and nutrients. Herbs like parsley, dill, and basil can be chopped and stored in ice cube trays with water or olive oil, giving you ready-to-use portions for cooking. 6. Organize Your Fridge Keeping your fridge organized helps prevent waste. Store similar items together, rotate older produce to the front, and check for signs of spoilage regularly. Even a small effort to maintain a tidy fridge can dramatically extend the life of your ingredients. Proper storage of herbs and vegetables isn’t just about longevity—it’s about preserving flavor, texture, and nutrients so that every meal you make is as fresh and vibrant as possible. By understanding the specific needs of each ingredient, using the right containers, controlling temperature and humidity, and practicing mindful organization, you can reduce waste and make your cooking more enjoyable. Fresh produce stored correctly means better-tasting dishes, less stress, and a more efficient kitchen overall.
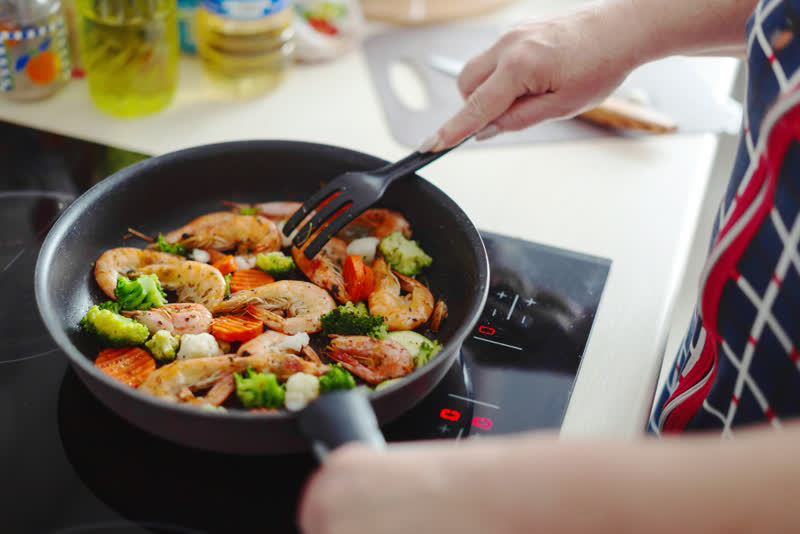
Sautéing vs. Pan-Frying vs. Stir-Frying: What’s the Difference?
When it comes to stovetop cooking, terms like sauteing, pan-frying, and stir-frying are often used interchangeably, but they are not the same. Understanding the differences between these techniques is essential for controlling flavor, texture, and cooking times, and it can turn an ordinary meal into something truly impressive. Sautéing: Quick, Gentle, and Flavorful Sautéing is a French term that literally means “to jump,” referring to the way ingredients jump in the pan during cooking. This technique uses a small amount of fat, usually oil or butter, over medium-high heat. The goal is to cook food quickly while developing flavor and maintaining a tender texture. Sautéing works best for vegetables, thin cuts of meat, or seafood. Key to success is keeping ingredients in a single layer, moving them occasionally, and avoiding overcrowding the pan, which can cause steaming instead of browning. The result is lightly caramelized, flavorful food with a delicate texture. Pan-Frying: Crispy on the Outside, Tender Inside Pan-frying uses more fat than sautéing and slightly lower heat, allowing thicker cuts of meat or denser vegetables to cook through without burning. Think of pan-frying as a balance between sautéing and deep-frying: the food develops a crispy exterior while the inside stays moist and tender. Chicken cutlets, pork chops, and breaded vegetables are classic examples. Unlike sautéing, pan-frying often involves turning the food only once or twice, giving it time to form a golden crust. A heavy-bottomed skillet is ideal, as it retains heat and ensures even browning. Stir-Frying: High Heat, Constant Movement Stir-frying is a cornerstone of Asian cooking and emphasizes speed, heat, and constant motion. Typically done in a wok or a wide, high-sided pan, this technique uses very high heat and a small amount of oil to cook small, uniform pieces of food rapidly. The constant stirring or tossing ensures that everything cooks evenly while developing a slight char or caramelization. Stir-frying is perfect for vegetables, thinly sliced meat, tofu, or noodles. The high heat seals in flavor and creates a bright, crisp texture that sautéing or pan-frying alone cannot achieve. Choosing the Right Technique The choice between sautéing, pan-frying, or stir-frying depends on the ingredients, desired texture, and flavor profile. If you want tender, lightly caramelized vegetables, sautéing is ideal. For thicker cuts of meat or breaded items that need a crispy exterior, pan-frying is your best bet. When time is short, or you want vibrant vegetables with a slight char, stir-frying provides maximum flavor in minimal time. Each method has its own rhythm and requirements, but mastering all three gives you versatility in the kitchen and ensures that every dish reaches its full potential. Sautéing, pan-frying, and stir-frying are simple techniques in theory, but understanding the subtle differences makes all the difference in practice. With the right heat, fat, and timing, these methods allow you to transform everyday ingredients into dishes with rich flavor, appealing texture, and professional-level results. Once you master the nuances, stovetop cooking becomes faster, easier, and far more satisfying.
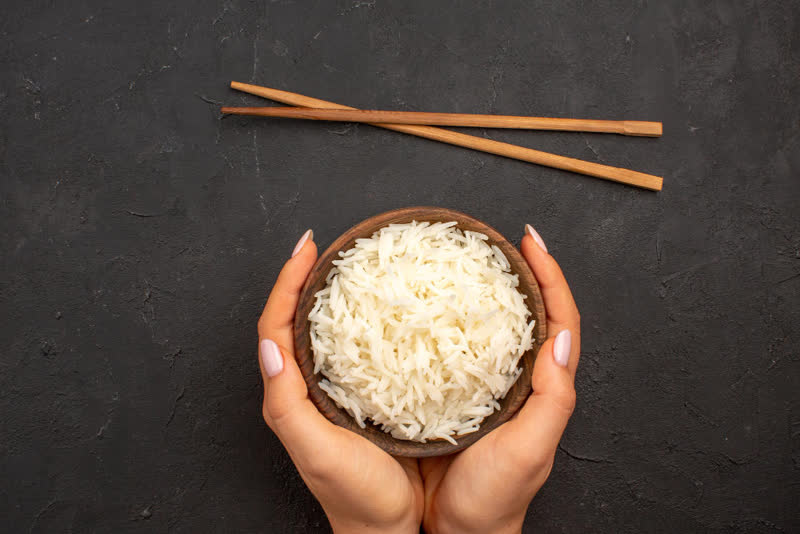
Secrets to Perfectly Cooked Rice Every Time
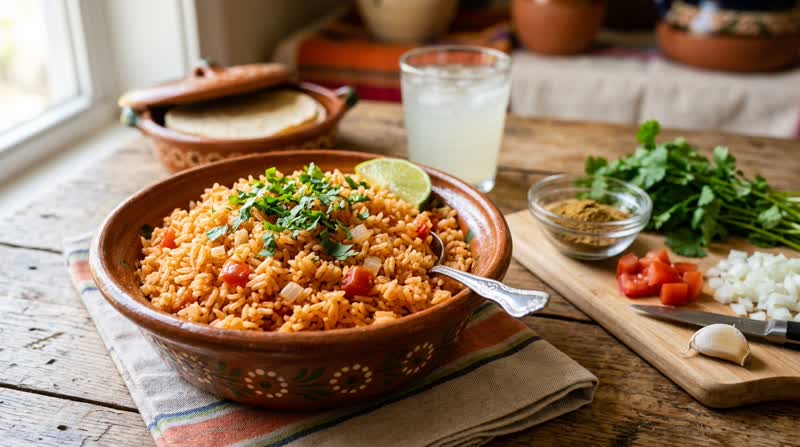
Rice is one of the most widely consumed foods in the world, yet many people struggle to cook it properly. It may seem simple, but achieving perfectly cooked rice - soft, fluffy, and not sticky or dry - requires attention to detail. By understanding a few essential techniques, anyone can consistently prepare rice with great results. The first step is choosing the right type of rice. Different varieties, such as long-grain, short-grain, or basmati, have different textures and cooking requirements. Long-grain rice tends to be light and separate, while short-grain rice is softer and stickier. Knowing which type to use for your dish is important for achieving the desired outcome. Rinsing the rice before cooking is another key step. Many people skip this process, but rinsing removes excess starch from the surface of the grains. This helps prevent the rice from becoming overly sticky and improves its final texture. Simply place the rice in a bowl, cover it with water, and rinse it several times until the water becomes clear. Using the correct water-to-rice ratio is essential. If you add more water than needed, the rice can become too soft, while using too little may result in hard grains. A common ratio is two cups of water for one cup of rice, but this can vary depending on the type of rice. Reading package instructions or adjusting based on experience can help you find the perfect balance. Heat control plays a major role in cooking rice successfully. Start by bringing the water to a boil, then reduce the heat to low and cover the pot. Letting the rice simmer gently allows it to absorb the water evenly. Avoid lifting the lid too often, as this releases steam and can disrupt the cooking process. Timing is equally important. Most types of rice need about 15 to 20 minutes to cook, but this can vary. Once the water is fully absorbed, remove the pot from the heat and let it sit, covered, for a few minutes. This resting period allows the rice to finish steaming and improves its texture. Fluffing the rice after cooking is a simple but effective step. Use a fork to gently separate the grains instead of stirring with a spoon, which can make the rice clump together. This helps maintain a light and airy texture. Finally, practice makes perfect. Cooking rice may take a few attempts to master, but small adjustments can lead to big improvements. By following these simple tips, you can prepare perfectly cooked rice every time and make it a reliable part of your meals.
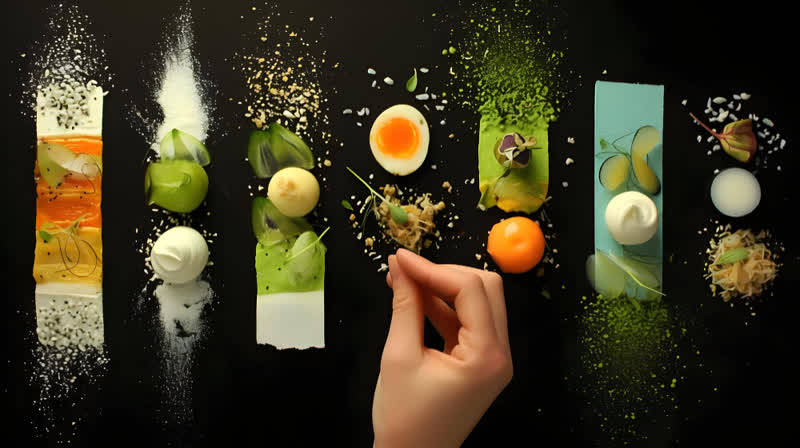
How to Balance Flavors Like a Professional Chef
Creating a well-balanced dish is one of the most important skills in cooking. Professional chefs understand that great food is not just about following a recipe, but about combining flavors in a way that feels complete and satisfying. Learning how to balance flavors can transform simple meals into something truly memorable. The foundation of flavor balance lies in understanding the five basic tastes: sweet, salty, sour, bitter, and umami. Each of these elements plays a role in how we experience food. A dish that includes a thoughtful combination of these tastes will feel more complex and enjoyable. For example, adding a touch of sweetness can soften strong acidity, while a bit of salt can enhance almost every flavor. One of the most useful habits in cooking is tasting your food regularly. Instead of waiting until the dish is finished, try it at different stages of the cooking process. This allows you to adjust flavors gradually rather than trying to fix everything at the end. Small changes, such as adding a pinch of salt or a splash of lemon juice, can make a noticeable difference. Acidity is often overlooked, but it is essential for brightening flavors. Ingredients like vinegar, citrus juice, or tomatoes can bring freshness to a dish and prevent it from tasting flat. When a meal feels too heavy or dull, a small amount of acid can bring it back to life. Texture also plays a role in how flavors are perceived. Combining different textures, such as crispy and soft or creamy and crunchy, can make a dish more interesting. While this is not a flavor in itself, it enhances the overall eating experience and helps highlight the balance of tastes. Another important aspect is restraint. Adding too many ingredients or spices can overwhelm a dish and make it confusing. Professional chefs often focus on a few key flavors and allow them to stand out. Simplicity, when done correctly, can be more effective than complexity. Understanding contrast is equally important. Pairing rich foods with something light or adding a hint of bitterness to a sweet dish creates depth. These contrasts keep the palate engaged and prevent flavors from becoming monotonous. Finally, developing a sense of balance takes time and practice. There is no single formula that works for every dish, and personal preference also plays a role. By experimenting with different ingredients and paying attention to how flavors interact, you can gradually improve your skills. With patience and curiosity, anyone can learn to balance flavors like a professional chef and create meals that are both delicious and well-rounded.
How to Make Homemade Pastry Flaky and Light
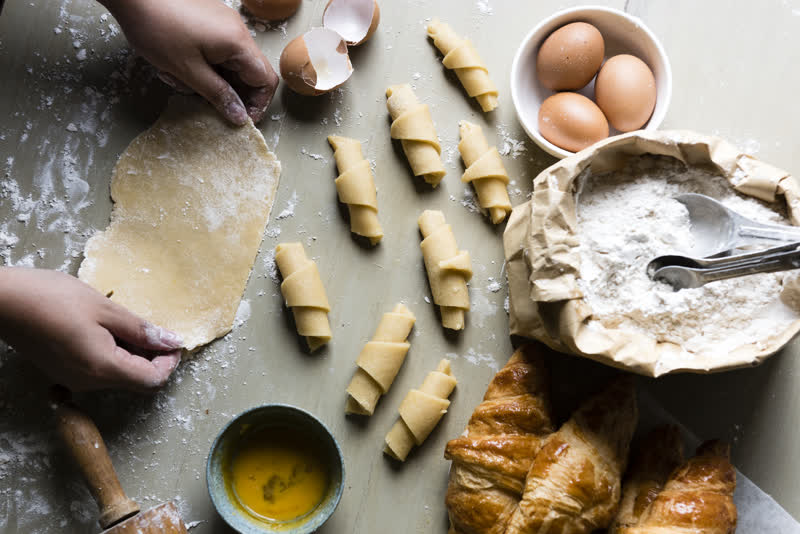
Few things in the kitchen feel as rewarding as making pastry from scratch. The crisp, buttery layers, the delicate texture, and the aroma that fills the house are unmatched by store-bought versions. Yet, achieving a truly flaky and light pastry can feel intimidating for beginners. With a few key techniques and an understanding of the science behind pastry, anyone can create a dough that rises beautifully and melts in your mouth. Understanding the Basics At its core, pastry is a simple mixture of flour, fat, water, and sometimes a touch of salt or sugar. But the simplicity is deceptive: the way these ingredients interact determines the texture. The fat—whether butter, shortening, or a combination—creates layers within the dough. When baked, the water in the fat turns to steam, lifting the layers and giving the pastry its signature flakiness. The flour provides structure, but overworking it develops gluten, which can make the pastry tough instead of tender. Keep Everything Cold Temperature is one of the most critical factors in pastry success. Cold butter and chilled water ensure that the fat remains in small, solid pieces throughout the dough. These pieces create pockets of steam during baking, forming the layers that make pastry flaky. Many bakers even chill their flour or use a pastry cutter or food processor to minimize heat transfer from their hands. The rule of thumb: the colder the ingredients, the flakier the pastry. Don’t Overwork the Dough Mixing too much can turn your dough tough. When combining flour and fat, work just enough to create a cohesive dough. It’s normal to see small chunks of butter remaining—these are essential for flakiness. When rolling out the dough, handle it gently and minimally. Over-rolling can compress the layers, reducing the light, airy texture you’re aiming for. Rest and Chill Once the dough is mixed, it needs time to rest. Chilling the dough for at least 30 minutes allows the gluten to relax, making it easier to roll out without shrinking. This also firms up the fat, which preserves those little pockets that will puff beautifully in the oven. Some recipes even call for multiple resting periods, especially in laminated pastries like croissants, to build structure and layers gradually. Baking Techniques Even the best dough requires proper baking to reach its full potential. Preheating the oven ensures that the pastry hits high heat immediately, allowing the layers to puff before the butter melts completely. Using a baking stone or a heavy sheet pan can provide even heat from the bottom, preventing soggy bottoms. Avoid opening the oven during the first critical minutes to maintain consistent temperature and allow the pastry to rise properly. Tips for Extra Flavor Butter is the star of most pastries, but small additions can elevate the flavor. A pinch of salt, a teaspoon of sugar in sweet doughs, or brushing the surface with an egg wash creates golden, glossy layers. Experimenting with different fats, like a mix of butter and lard or adding a touch of cream, can also enhance flakiness and flavor complexity. Making homemade pastry flaky and light isn’t about following strict rules—it’s about understanding how ingredients and techniques interact. By keeping everything cold, handling the dough gently, allowing proper resting, and paying attention to baking details, anyone can achieve pastries that are crisp, airy, and utterly delicious. With practice, what once seemed intimidating becomes a joyful, creative process that rewards you—and anyone lucky enough to taste it.
How to Make Vegetables Taste Amazing
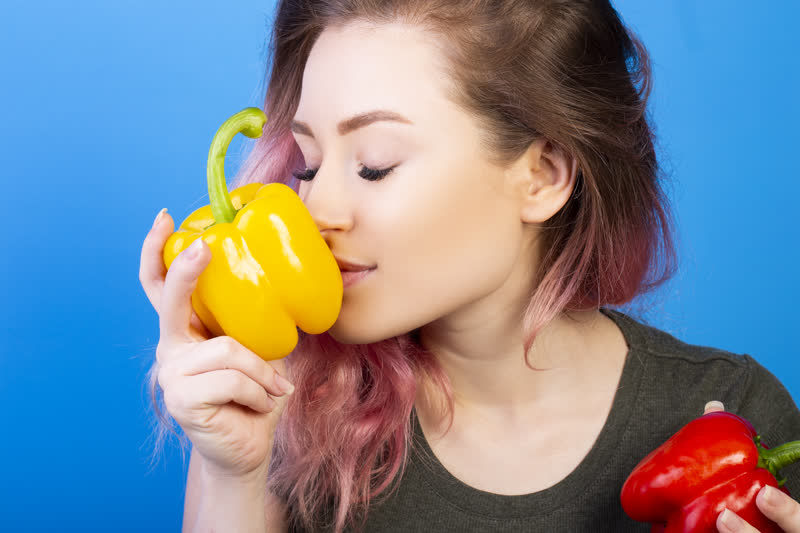
Vegetables are often underrated in the kitchen. Too many people treat them as a side note or a bland filler, when in reality, vegetables can be the star of any meal. The key to making them truly delicious lies in understanding how to bring out their natural flavors, textures, and aromas. With a few simple techniques, you can turn everyday produce into dishes that are vibrant, satisfying, and unforgettable. Start with Fresh, Seasonal Produce The foundation of any great vegetable dish is freshness. Seasonal vegetables not only taste better but also have more natural sweetness, crispness, and aroma. Look for vibrant colors, firm textures, and minimal blemishes. Herbs and aromatics like garlic, shallots, ginger, and fresh herbs will also make a dramatic difference. Using quality ingredients ensures that even simple preparations will shine. Embrace High-Heat Cooking One of the easiest ways to enhance vegetables is to roast, sauté, or stir-fry them at high heat. High temperatures caramelize natural sugars, creating deep, rich flavors that boiling alone cannot achieve. Roasting root vegetables like carrots, beets, and sweet potatoes brings out their inherent sweetness, while pan-searing broccoli, Brussels sprouts, or asparagus adds a slightly crispy, nutty dimension. Don’t be afraid of a little browning—it’s flavor. Master Seasoning Salt is essential, but it’s only the beginning. A balanced combination of salt, acid, and fat transforms vegetables. Acids like lemon juice, vinegar, or even a splash of wine brighten the flavors, balancing richness or sweetness. Freshly ground pepper adds depth and subtle heat, while spices such as smoked paprika, cumin, or chili flakes create complexity. Taste as you cook, and layer seasonings gradually to enhance the vegetable’s natural character rather than masking it. Use Fat to Your Advantage Fat is flavor carrier. Olive oil, butter, or coconut oil enhances texture and adds richness to vegetables, helping seasonings adhere and intensifying natural taste. Drizzling hot-roasted vegetables with a touch of good olive oil, finishing sautéed greens with butter, or sprinkling roasted vegetables with toasted nuts or cheese can elevate the dish from ordinary to extraordinary. Even a small amount of fat can make flavors more harmonious and satisfying. Build Layers of Flavor Creating delicious vegetables isn’t just about cooking—they also benefit from layering. Combine multiple techniques to maximize flavor: roast for sweetness, then toss with fresh herbs or a squeeze of citrus; sauté lightly, then finish with a touch of soy sauce or miso for umami. Aromatics, fermented ingredients, or a dash of spice can all be used to enhance depth. Think of each layer as a note in a symphony—when combined thoughtfully, the result is harmonious and exciting. Mind the Texture Texture plays a huge role in how enjoyable vegetables are. Overcooked, soggy vegetables can kill even the best flavors. Crisp-tender textures, achieved through proper cooking times and high heat, create contrast and interest on the plate. Combining soft, roasted vegetables with crunchy nuts, seeds, or croutons creates a satisfying bite every time. Present with Care The way vegetables look can affect how we perceive their flavor. Bright, colorful vegetables plated thoughtfully will seem more appetizing. Even simple garnishes like chopped fresh herbs, a drizzle of dressing, or a sprinkle of seeds can make a big visual and flavor impact. Vegetables don’t have to be boring or bland. By choosing fresh, seasonal produce, cooking with high heat, seasoning thoughtfully, layering flavors, using fat wisely, and paying attention to texture and presentation, you can create vegetable dishes that are as exciting as any protein-based main. With these techniques, even everyday veggies can become the highlight of your meal—vibrant, flavorful, and completely irresistible.
The Beginner’s Guide to Cooking with Spices
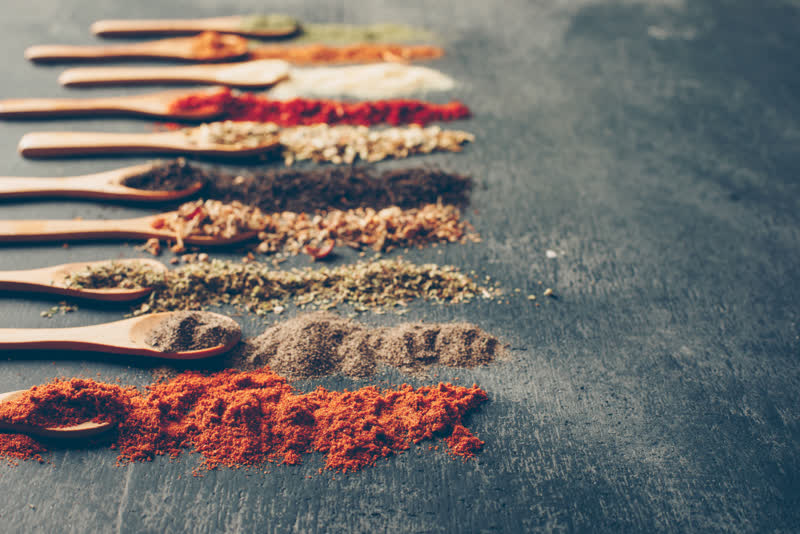
Cooking with spices can transform simple ingredients into flavorful and exciting meals. For beginners, however, spices may seem confusing or even intimidating. With so many options available, it can be difficult to know where to start or how to combine them properly. Fortunately, learning to use spices does not have to be complicated. With a few basic principles, anyone can begin to cook with confidence. The first step is understanding what spices are and how they differ from herbs. Spices usually come from seeds, roots, or bark, while herbs are typically the leaves of plants. Common spices include pepper, paprika, cumin, and cinnamon. Each spice has its own unique flavor profile, ranging from mild and sweet to strong and earthy. Starting with a small selection of spices is a good idea. Instead of buying everything at once, focus on a few versatile options that can be used in many dishes. For example, garlic powder, black pepper, and paprika are excellent for savory meals, while cinnamon works well in both sweet and savory recipes. Once you gain confidence, start adding new spices to your pantry little by little. Knowing when to add spices during cooking is also important. Some spices release their flavor better when heated, while others are best added at the end. For instance, spices like cumin or paprika often develop a deeper flavor when cooked briefly in oil at the beginning. On the other hand, delicate spices may lose their aroma if exposed to heat for too long. Measuring spices carefully can help you avoid overpowering your dish. It is usually better to start with a small amount and add more if needed. This approach allows you to control the intensity of the flavor and prevents mistakes that are difficult to fix. Checking the taste during preparation helps you fine-tune the seasoning and achieve the perfect balance. This habit allows you to understand how different spices affect the overall flavor. Over time, you will develop a sense of which combinations work well together and which ones do not. Proper storage is often overlooked but makes a big difference. To maintain their flavor, store spices in a dark, dry cupboard instead of leaving them exposed to light or humidity. This helps preserve their flavor and ensures they remain effective for a longer time. Finally, do not be afraid to experiment. Cooking with spices is both creative and personal. Trying new combinations and adjusting flavors to your preference is part of the learning process. With practice and curiosity, you can develop the skills needed to create delicious and well-seasoned dishes every time.
How to Cook Proteins Perfectly Every Time
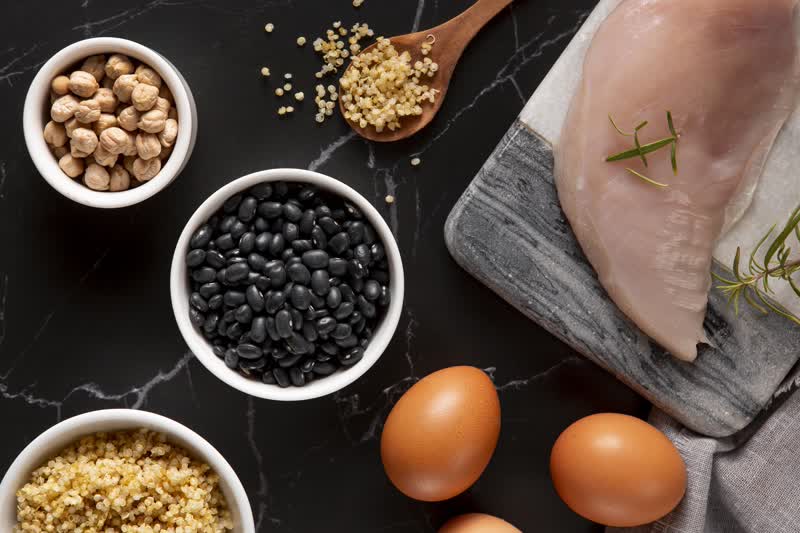
Cooking proteins - whether it is meat, poultry, fish, or plant-based alternatives - can feel intimidating. Overcooked chicken, dry steak, or rubbery tofu can turn even the most carefully prepared meal into a disappointment. Yet, achieving perfectly cooked proteins consistently is less about luck and more about understanding technique, temperature, and timing. Once you master a few key principles, cooking proteins becomes reliable, satisfying, and even enjoyable. Start with Quality Ingredients The foundation of any great protein dish begins with the ingredients themselves. Fresh, high-quality meat, fish, or plant-based protein will taste better, cook more evenly, and respond predictably to heat. For meat and fish, look for firm texture, vibrant color, and minimal blemishes. For plant-based proteins like tofu or tempeh, choosing fresh, firm varieties will ensure they hold their shape and absorb flavors more effectively. Understand Doneness Different proteins require different levels of doneness. Overcooking leads to dryness and toughness, while undercooking can pose safety risks. A reliable meat thermometer is one of the simplest tools to remove guesswork. For example: Chicken should reach an internal temperature of 75°C (165°F) Beef steaks vary: 50–52°C (120–125°F) for rare, 60°C (140°F) for medium Fish is done at 50–60°C (120–140°F) depending on thickness Pork should reach 63°C (145°F) For plant-based proteins, the key is texture: firm tofu should be golden and slightly crispy on the outside while tender inside, while tempeh benefits from marination and even browning. Prep and Season Thoughtfully Salt, acid, and fat enhance the flavor of proteins and also improve texture. Salting in advance, known as dry brining, helps meat retain moisture during cooking. Marinades not only add flavor but can also tenderize tougher cuts. A quick sear in oil or butter can create a flavorful crust that locks in juices. Even plant-based proteins benefit from seasoning and oil to develop flavor and color. Master Your Cooking Methods The technique you choose depends on the type and cut of protein: Searing: High heat creates a caramelized, flavorful crust. Ideal for steaks, chicken breasts, and tofu. Roasting/Baking: Even heat ensures thick cuts of meat or whole poultry cook through without burning. Grilling: Adds smoky flavor and char, but requires careful temperature control to avoid overcooking. Poaching/Steaming: Gentle heat preserves moisture and tenderness, perfect for fish or delicate proteins. Rest Before Serving Resting proteins is a critical, often overlooked step. During cooking, juices are pushed toward the center of the meat. Letting it rest for 5–10 minutes allows juices to redistribute, resulting in tender, juicy bites. Cutting too soon can release all the liquid, leaving the protein dry. Even with fish and plant-based proteins, a short rest helps maintain structure and flavor. Pay Attention to Visual and Tactile Cues While thermometers are the most accurate tool, visual and tactile cues are also useful. A perfectly cooked steak has a firm yet springy texture; fish flakes easily but is still moist; tofu or tempeh develops a golden crust with a tender interior. Observing and touching your proteins regularly will improve your intuition over time. Cooking proteins perfectly every time isn’t about complex recipes - it’s about respect for the ingredient, understanding heat, timing, and seasoning, and practicing simple techniques consistently. With quality ingredients, proper prep, precise cooking methods, and a little patience, every meal can feature juicy, flavorful proteins that impress both the eyes and the palate.
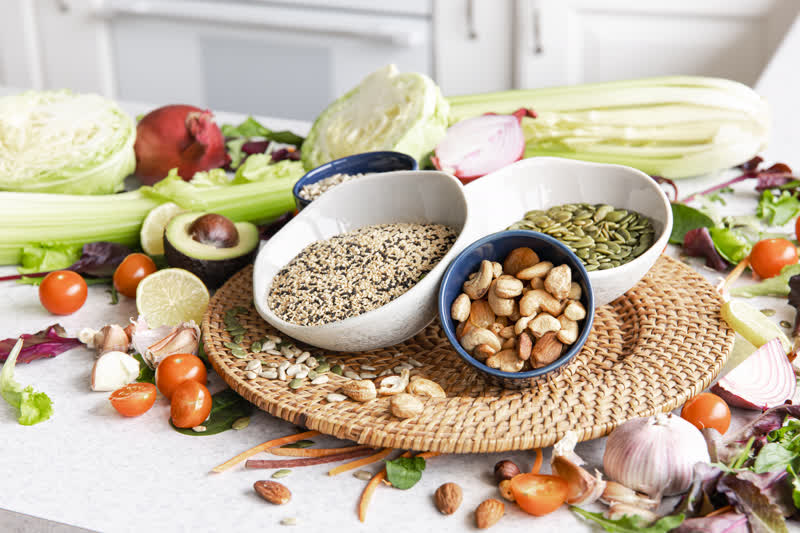
How to Build Balanced Bowls: Grains, Protein, and Veggies
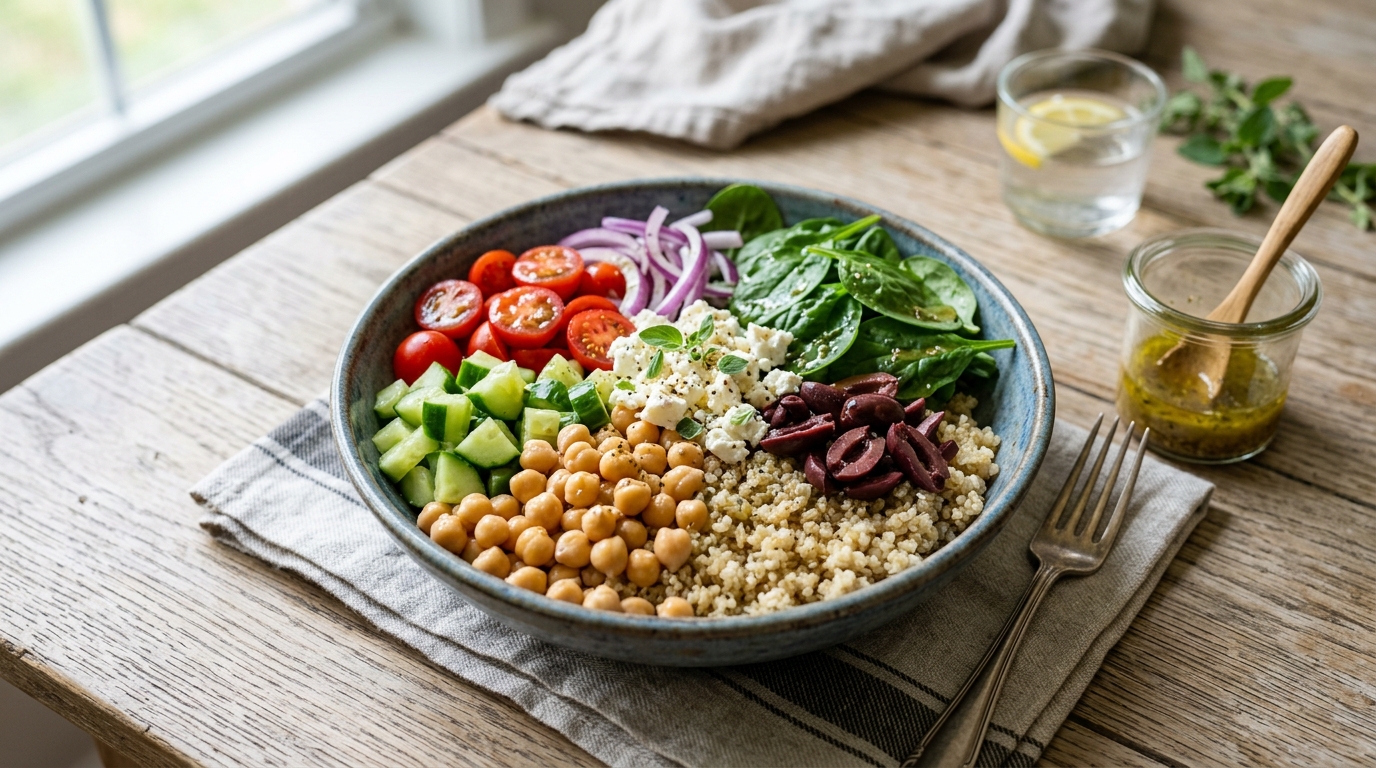
Balanced bowls have become a staple in modern cooking, combining nutrition, flavor, and convenience in a single dish. A well-constructed bowl isn’t just visually appealing—it’s a complete meal, providing protein, fiber, healthy fats, and a variety of textures and colors that satisfy both the palate and the body. Learning how to build balanced bowls is less about strict recipes and more about understanding proportions, flavor harmony, and ingredient variety. Start with a Base of Grains The foundation of any bowl is often a grain or starch. Grains provide energy, fiber, and a neutral backdrop for other ingredients. Brown rice, quinoa, farro, bulgur, or barley are excellent options, each bringing a slightly different texture and flavor. For a lighter option, consider cauliflower rice or spiralized vegetables. A good base should be cooked properly—fluffy, tender, and seasoned lightly—so it complements, rather than competes with, the toppings. Add Protein for Satiety Protein is essential for fullness and balanced nutrition. Depending on your dietary preference, this can be meat, poultry, fish, tofu, tempeh, legumes, or even eggs. Proteins can be roasted, grilled, pan-seared, or poached, but the key is proper cooking and seasoning. Proteins should have bold, complementary flavors because they anchor the bowl. For example, a marinated grilled chicken pairs beautifully with roasted vegetables, while crispy tofu or chickpeas add texture and interest to plant-based bowls. Pile on Vegetables for Color and Nutrients Vegetables bring crunch, freshness, and flavor to every bowl. Aim for a mix of textures: roasted or sautéed vegetables provide warmth and depth, while raw vegetables or greens add brightness and crispness. Think colorful bell peppers, shredded carrots, roasted broccoli, spinach, kale, or avocado. Using seasonal vegetables ensures vibrant flavor, and combining raw and cooked ingredients enhances both taste and texture. Don’t Forget Healthy Fats Healthy fats are essential for flavor and satiety. Drizzle extra-virgin olive oil, tahini, or avocado over the top, or sprinkle seeds, nuts, or cheese to add richness and texture. Fats also help absorb fat-soluble vitamins in vegetables, making your bowl as nutritious as it is delicious. Layer Flavor with Dressings and Sauces A flavorful dressing or sauce can elevate a simple bowl into something extraordinary. A vinaigrette, yogurt-based dressing, or soy-ginger sauce can tie all the components together. The trick is balance: you want enough dressing to enhance the flavors without drowning the ingredients. Herbs, citrus juice, and spices in the dressing add freshness and complexity. Pay Attention to Balance and Presentation A truly balanced bowl is visually and nutritionally balanced. Aim for roughly 40% vegetables, 30% grains, and 30% protein, adjusting based on dietary needs. Layer ingredients thoughtfully, using color contrasts and textures to make the bowl appealing. A well-constructed bowl should excite the eyes before it even reaches the mouth. Building balanced bowls is both practical and creative. By combining grains, protein, vegetables, healthy fats, and flavorful dressings, you create a meal that’s satisfying, nourishing, and delicious. The beauty of bowls lies in their versatility: once you understand the principles, you can mix and match ingredients endlessly, making every bowl uniquely yours while maintaining perfect balance and flavor.
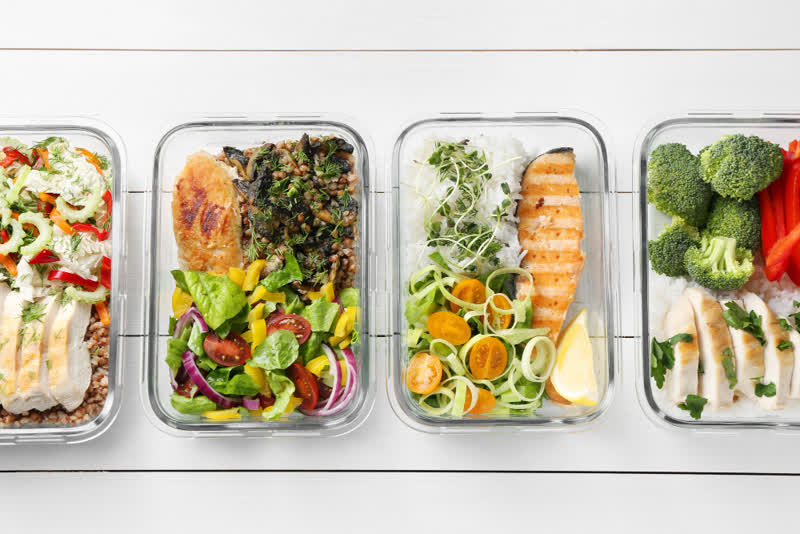
The Art of Meal Prep: Save Time and Eat Better
Meal prepping is a powerful way to save time, reduce stress, and maintain a healthier diet. By planning and preparing your meals in advance, you can take control of what you eat, avoid last-minute unhealthy choices, and ensure that every meal is balanced and satisfying. With a few strategies, meal prep can become a simple and enjoyable part of your weekly routine. The initial stage of meal prepping involves deciding what to cook for the week. Take some time to decide what you want to eat, keeping in mind your nutritional needs and personal preferences. Creating a shopping list based on your plan helps prevent unnecessary purchases and ensures you have everything you need. Planning also allows you to consider meals that can be easily cooked in batches, saving time in the long run. Choosing versatile ingredients is key. Foods like rice, pasta, beans, and roasted vegetables can be used in multiple dishes, making your prep more efficient. Proteins such as chicken, tofu, or fish can be cooked in larger quantities and combined with different sides to create a variety of meals. Using ingredients that store well in the fridge or freezer ensures that your prepared meals remain fresh throughout the week. Organization is another important aspect of meal prepping. Invest in reusable containers that are easy to label and stack. Portioning out your meals in advance not only helps with controlling serving sizes but also makes it easy to grab a ready-to-eat lunch or dinner on busy days. Labeling containers with dates or meal names can further streamline your routine. Timing your prep is essential. Many people find it efficient to dedicate a few hours on a weekend day to cook and assemble their meals for the week. Start with foods that take longer to cook and then move on to faster items. Multi-tasking in the kitchen, such as roasting vegetables while boiling grains, can maximize efficiency. Incorporating fresh elements into your prepped meals improves flavor and nutrition. Adding fresh herbs, greens, or a squeeze of lemon just before eating can elevate a dish that has been stored in the fridge. This small touch keeps your meals tasting vibrant and enjoyable. Finally, meal prep is not just about convenience; it encourages healthier choices. When your meals are ready and accessible, you are less likely to reach for processed snacks or fast food. Over time, meal prepping helps establish better eating habits and reduces food waste. By investing a little time and effort into meal prep, you can make your week easier, save money, and consistently enjoy balanced, delicious meals. With practice, this approach becomes second nature and transforms the way you eat, making healthy living both practical and satisfying.
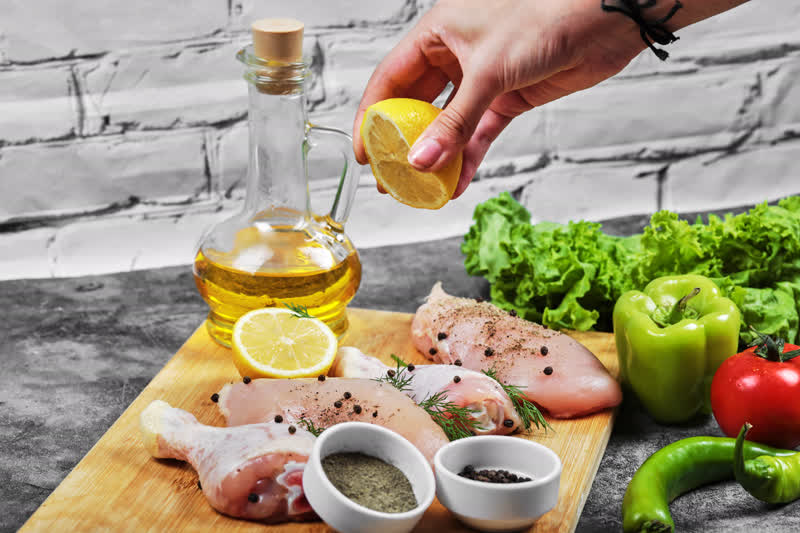
Marinating 101: How to Infuse Maximum Flavor</title>
Marinades are one of the easiest ways to transform ordinary proteins and vegetables into flavorful, tender, and exciting dishes. Yet, despite their simplicity, many cooks make mistakes—using the wrong ingredients, marinating too long, or skipping important techniques. Understanding how marinades work and how to apply them effectively can elevate your cooking, making every meal more delicious and memorable. What a Marinade Does At its core, a marinade serves three main purposes: Flavor – Herbs, spices, aromatics, and acids infuse food with complexity. Tenderization – Acids (like citrus juice or vinegar) and enzymes (from ingredients like pineapple or papaya) help break down proteins for a more tender bite. Moisture Retention – Oil and other fats coat the food, locking in natural juices during cooking. A well-balanced marinade combines these elements, but the proportions matter. Too much acid can “cook” the protein prematurely or make it mushy, while too little flavor may result in a bland dish. Choosing the Right Ingredients Acid: Lemon juice, lime juice, vinegar, yogurt, or wine help break down tough fibers and brighten flavor. Fat: Olive oil, sesame oil, or coconut oil adds richness and helps herbs and spices cling. Aromatics & Herbs: Garlic, ginger, shallots, scallions, and fresh or dried herbs create layers of taste. Seasonings: Salt, pepper, spices, and sugar balance flavors and enhance caramelization during cooking. The key is harmony—ingredients should complement the protein or vegetables rather than overpower them. Timing Is Everything How long you marinate depends on the type of food and the strength of the marinade: Delicate proteins like fish or shrimp: 15–30 minutes Chicken breasts or tofu: 30 minutes to 2 hours Tough cuts of beef, pork, or lamb: 4–24 hours Marinating too long, especially with strong acids, can break down the protein excessively, leaving it mushy. Conversely, too short a marination may not impart enough flavor. Techniques for Maximum Flavor Score or pierce thicker cuts – small slits allow the marinade to penetrate deeper. Use a resealable bag – ensures even coating and minimizes waste. Massage the marinade in – gentle pressing or tossing helps distribute flavors. Bring to room temperature before cooking – this ensures even cooking and better flavor absorption. Beyond Meat: Marinades for Vegetables Vegetables and plant-based proteins also benefit from marinating. Tofu, tempeh, mushrooms, and eggplant absorb flavors beautifully. For vegetables, shorter marination times are sufficient, and roasting, grilling, or pan-searing helps intensify the flavors infused by the marinade. Cooking and Finishing When cooking marinated foods, be mindful of sugars or oils in the marinade—they can burn if the heat is too high. For sticky marinades, consider brushing on toward the end of cooking to preserve flavor and prevent scorching. Always discard used marinade unless you boil it first, to avoid contamination. Marinating isn’t just a step in a recipe—it’s a powerful tool to elevate flavor, texture, and enjoyment in your meals. By balancing acid, fat, and aromatics, respecting timing, and applying thoughtful techniques, you can transform proteins and vegetables alike into deeply flavorful, tender, and satisfying dishes. Once you understand the principles of marinating, the possibilities in the kitchen become endless.
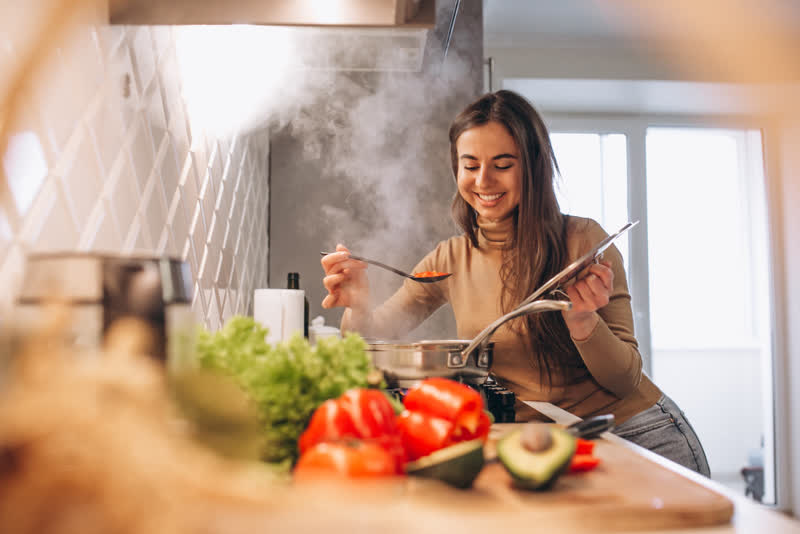
How to Build Confidence in the Kitchen as a Beginner
Starting out in the kitchen can be intimidating. From chopping vegetables to managing multiple pots on the stove, beginners often feel overwhelmed. However, confidence in cooking is a skill that develops with practice, patience, and the right approach. By following some simple strategies, anyone can become more comfortable and capable in the kitchen. The first step is to begin with simple recipes. Instead of attempting complex dishes, focus on meals with a few ingredients and straightforward steps. Mastering these basics builds your skills and provides a sense of accomplishment. For example, preparing a basic pasta dish or a simple stir-fry is a great way to start without feeling pressured. Organization is essential for a smooth cooking experience. Gather all your ingredients and tools before you start. This approach, often called “mise en place,” helps prevent mistakes and reduces stress. Knowing where everything is keeps you focused on cooking rather than searching for utensils or ingredients in the middle of the process. Learning to read and follow recipes carefully is another important step. Pay attention to measurements, cooking times, and instructions. At the same time, don’t be afraid to make small adjustments based on your preferences or available ingredients. Cooking is as much about creativity as it is about precision. Practice knife skills safely and consistently. Proper techniques for chopping, slicing, and dicing make tasks faster and safer. Start with basic cuts and gradually move to more advanced techniques as your confidence grows. A sharp knife is also safer than a dull one, as it requires less force and reduces the risk of slipping. Tasting your food while cooking is a key habit for building confidence. Sampling your dish allows you to adjust the seasoning and flavors gradually. This interactive approach helps you learn how different ingredients and spices affect the final result, giving you control over your cooking. Another way to boost confidence is to embrace mistakes as learning opportunities. Everyone burns a dish or over-salts occasionally, even experienced chefs. The important part is to analyze what went wrong, learn from it, and try again. Each mistake is a step toward becoming a more skilled cook. Finally, gradually challenge yourself with new recipes and techniques. Once you are comfortable with basic meals, experiment with different cuisines, ingredients, and cooking methods. Over time, your skills will expand, and cooking will feel less daunting and more enjoyable. By starting small, staying organized, practicing safely, and learning from mistakes, beginners can steadily build confidence in the kitchen. With persistence and curiosity, cooking can become a rewarding and empowering skill that opens the door to endless culinary possibilities.
The Science of Smoking and Slow-Cooking Meat
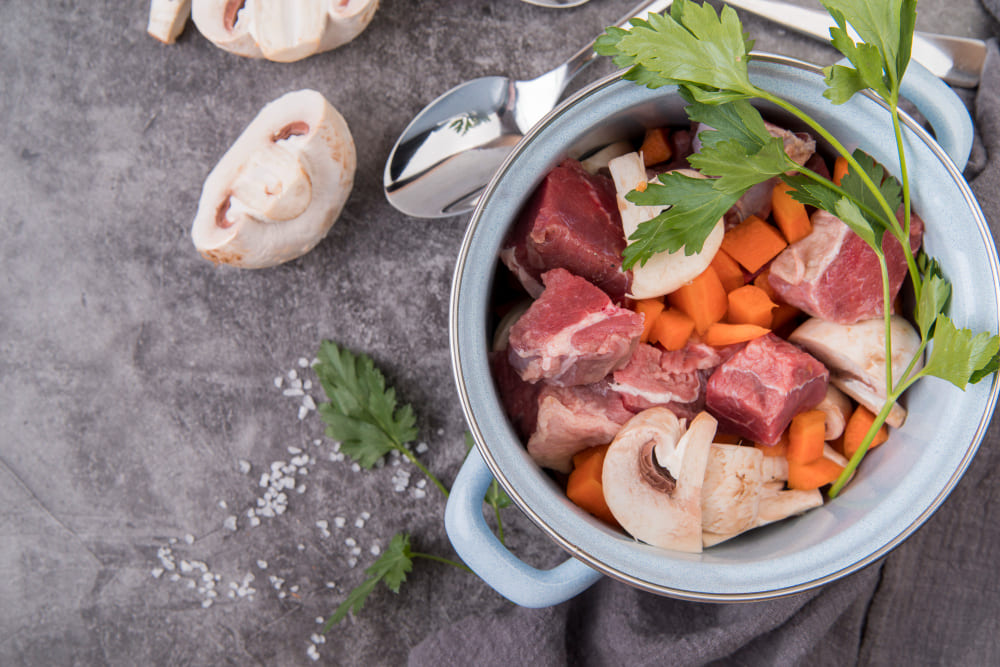
Smoking and slow-cooking meat are among the oldest cooking methods in the world, yet they remain some of the most complex and rewarding techniques in modern kitchens. Whether it’s a tender brisket, fall-off-the-bone ribs, or deeply flavorful pulled pork, the magic behind these dishes lies in patience, temperature control, and a fascinating interplay of chemistry and physics. Understanding the science behind these methods can help you achieve consistently rich, tender, and smoky results. Low and Slow: Why It Works At the heart of slow-cooking is the principle of low, steady heat applied over a long period of time. Tough cuts of meat, such as brisket, pork shoulder, or ribs, contain a significant amount of connective tissue, particularly collagen. When exposed to low temperatures over several hours, collagen gradually breaks down into gelatin. This process transforms tough, chewy meat into something tender, juicy, and silky in texture. Cooking at high heat would cause the muscle fibers to tighten too quickly, squeezing out moisture and leaving the meat dry. Slow cooking, by contrast, allows the meat to relax and retain its juices, creating a much more pleasant eating experience. The Role of Smoke Smoking adds another dimension of flavor that cannot be replicated by other cooking methods. As wood burns, it releases a complex mixture of compounds, including phenols and carbonyls, which attach to the surface of the meat. These compounds are responsible for the deep, smoky aroma and the distinctive flavor associated with barbecue. The type of wood you use matters. Hardwoods like oak, hickory, apple, or cherry each impart their own subtle flavor profiles, ranging from strong and robust to sweet and mild. Choosing the right wood allows you to tailor the flavor to the specific type of meat you’re cooking. Temperature Control Is Everything Consistency is key when smoking or slow-cooking. Most barbecue is cooked in the range of 105–135°C (225–275°F), which allows enough heat to break down connective tissue without drying out the meat. Maintaining this temperature requires careful control of airflow, fuel, and timing. One phenomenon often encountered during smoking is “the stall,” where the internal temperature of the meat stops rising for a period of time. This happens due to evaporative cooling, as moisture from the meat’s surface evaporates and cools it down—similar to how sweat cools the human body. Many cooks wrap the meat in foil or butcher paper during this stage to push through the stall and retain moisture. The Importance of Moisture and Fat Fat and moisture play a crucial role in slow-cooked meats. As fat renders over time, it bastes the meat internally, adding richness and preventing dryness. Meanwhile, maintaining a humid cooking environment—often by placing a water pan in the smoker—helps keep the surface from drying out too quickly, allowing smoke to adhere more effectively. Building the Bark One of the most prized elements of smoked meat is the “bark,” the dark, flavorful crust that forms on the outside. This crust develops through a combination of the Maillard reaction, caramelization, and the gradual accumulation of smoke particles. Seasonings, often in the form of a dry rub, contribute to this process by adding sugars, spices, and salt that enhance both flavor and texture. Resting and Finishing Just like with other cooking methods, resting is essential. After hours of cooking, allowing the meat to rest gives juices time to redistribute and the gelatin to set slightly, resulting in a more cohesive texture. Skipping this step can undo much of the work that went into the cooking process. Smoking and slow-cooking meat are as much about patience as they are about technique. By understanding how low heat transforms connective tissue, how smoke infuses flavor, and how temperature and moisture interact, you can take control of the process and achieve consistently exceptional results. What may seem like a long and slow journey ultimately rewards you with deeply flavorful, tender meat that showcases both the science and the art of cooking.
Unlock the Secret to Perfect Chocolate Every Time
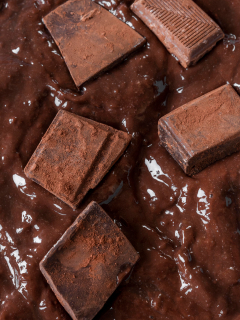
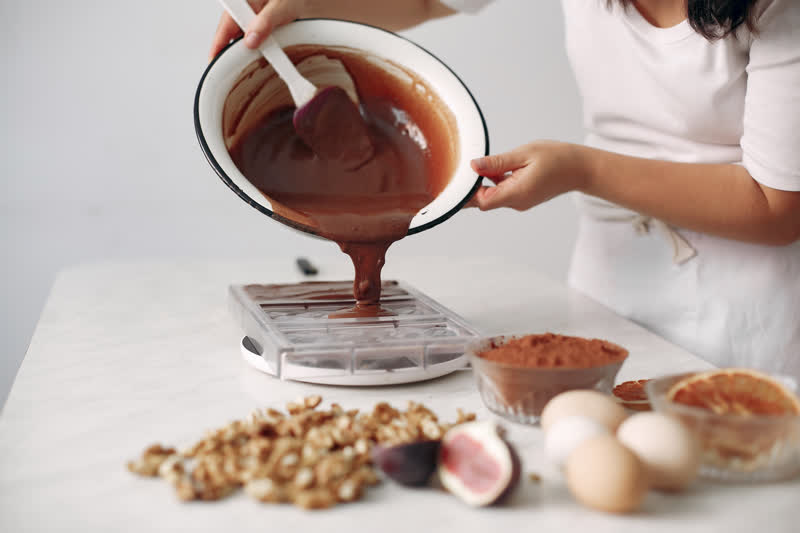
Tempering chocolate is one of those techniques that seems intimidating at first but becomes deeply satisfying once mastered. That glossy finish, clean snap, and smooth texture you find in professional-quality chocolate all come down to one thing: properly controlled crystallization. While it may sound technical, tempering is simply about managing temperature and movement to guide chocolate into its most stable and beautiful form. Understanding Chocolate Structure Chocolate contains cocoa butter, a fat that can crystallize in several different ways. Not all crystal forms are desirable—some result in dull, soft, or streaky chocolate. The goal of tempering is to encourage the formation of stable crystals, which give chocolate its shine, firmness, and satisfying snap when broken. When chocolate is melted without tempering, these crystals form randomly, leading to a grainy texture or a grayish coating known as bloom. Proper tempering prevents this, ensuring a professional-looking and tasting result. The Basic Tempering Process Tempering involves three key stages: melting, cooling, and reheating. First, the chocolate is gently melted to dissolve all existing crystals. This is typically done using a double boiler or in short bursts in the microwave, taking care not to overheat. Once melted, the chocolate is cooled while being stirred continuously. This encourages the formation of stable crystals. Finally, the chocolate is gently reheated to a working temperature, ensuring it remains fluid while maintaining the desired crystal structure. This balance is what gives tempered chocolate its signature qualities. Precision Matters Temperature control is crucial throughout the process. Different types of chocolate—dark, milk, and white—have slightly different temperature ranges for melting and working. Even a small deviation can affect the final result. Using a thermometer can make a significant difference, especially for beginners, as it removes much of the guesswork. Stirring is equally important. Movement helps distribute heat evenly and promotes the formation of stable crystals. Without consistent stirring, the chocolate may set unevenly or lose its temper. Techniques for Success There are several methods for tempering chocolate, but one of the most popular is the “seeding” method. This involves adding small pieces of already tempered chocolate into melted chocolate, which helps guide the formation of stable crystals. Another method, often used by professionals, is tabling—spreading melted chocolate on a cool surface and working it with a spatula until it thickens, then mixing it back in. Whichever method you choose, the key is patience. Rushing the process or overheating the chocolate can undo all your effort. Gentle handling and attention to detail are what lead to consistent results. Testing the Temper Before using your chocolate, it’s important to test whether it’s properly tempered. Dip a knife or a small piece of parchment into the chocolate and let it sit at room temperature. If it sets within a few minutes with a glossy finish and firm texture, it’s ready to use. If it remains soft or streaky, it may need further tempering. Why Tempering Matters Tempered chocolate isn’t just about appearance—it affects texture and usability as well. Properly tempered chocolate sets quickly, making it ideal for dipping, molding, or coating desserts. It also has a smoother mouthfeel and resists melting in your hands as quickly as untempered chocolate. Tempering chocolate is both a science and an art. While it requires precision and patience, it’s a skill that opens up endless possibilities in the kitchen, from elegant desserts to professional-quality confections. With practice, what once seemed complicated becomes intuitive, and the reward is chocolate that looks beautiful, tastes incredible, and delivers that perfect snap every time.
Smart Kitchen Organization for Better Cooking
A well-organized kitchen is more than just visually pleasing - it is the foundation of efficient, stress-free cooking. Whether you’re preparing a quick weekday meal or tackling a more ambitious recipe, the way your kitchen is arranged can either support your workflow or slow you down. By organizing your space with intention, you can save time, reduce clutter, and make cooking a far more enjoyable experience. Start by Decluttering Efficiency begins with simplicity. Over time, kitchens tend to accumulate unused gadgets, duplicate tools, and items that rarely see the light of day. The first step is to clear out what you don’t need. Keep tools and equipment you use regularly and store or donate the rest. A clutter-free space not only looks better but also makes it easier to find what you need when you need it. Create Functional Zones One of the most effective ways to organize your kitchen is by dividing it into zones based on tasks. Think of your kitchen in terms of how you actually use it. A prep zone near your cutting board and knives, a cooking zone around the stove, and a cleaning zone near the sink can dramatically improve your workflow. Keeping related items together - such as utensils near the stove or spices within reach - reduces unnecessary movement and saves time during cooking. Keep Essentials Within Reach Frequently used items should always be easily accessible. Store everyday tools like knives, cutting boards, and cooking utensils in convenient locations. Pots and pans should be close to the stove, while commonly used ingredients like oil, salt, and spices should be within arm’s reach. By minimizing the need to search or move around the kitchen, you create a smoother and more efficient cooking process. Optimize Storage Space Making the most of your storage is key to maintaining order. Use drawer organizers to separate utensils, stackable containers for pantry items, and shelf risers to maximize vertical space. Clear containers are especially helpful because they allow you to see what you have at a glance, reducing waste and preventing overbuying. Labeling pantry items can also save time and make your kitchen feel more structured. Maintain a Clean Workspace An efficient kitchen is a clean kitchen. Keeping your workspace tidy as you cook helps prevent clutter from building up and makes the process more enjoyable. Simple habits, like washing dishes as you go or wiping surfaces regularly, can make a big difference. A clean environment also makes it easier to focus and reduces the chances of mistakes. Plan Ahead Organization isn’t just physical - it’s also about planning. Before you start cooking, take a few minutes to read through your recipe, gather ingredients, and prepare what you can in advance. This approach, often referred to as mise en place, ensures that everything is ready when you need it, reducing stress and improving efficiency. Organizing your kitchen for maximum efficiency is not about perfection; it’s about creating a system that works for you. By decluttering, setting up functional zones, keeping essentials within reach, and maintaining a clean and thoughtful workspace, you can transform your kitchen into a place where cooking feels natural and enjoyable. With the right setup, even complex meals become easier to manage, and everyday cooking becomes a smoother, more satisfying experience.

What You’re Doing Wrong in the Kitchen
Cooking at home should feel rewarding, but for many people, it often leads to frustration—meals that don’t taste quite right, textures that fall flat, or recipes that simply don’t turn out as expected. The truth is, most kitchen problems don’t come from lack of effort, but from small, common mistakes that are easy to overlook. Once you recognize and fix these habits, your cooking can improve dramatically without needing complicated techniques or expensive ingredients. You’re Not Seasoning Properly One of the biggest reasons food tastes bland is improper seasoning. Many home cooks either under-season or only add salt at the very end. Seasoning should happen throughout the cooking process, not just as a finishing touch. Salt enhances natural flavors, but it needs time to integrate into the dish. At the same time, balancing flavors with acid—like lemon juice or vinegar—can brighten a meal and make it taste more complete. You’re Overcrowding the Pan When cooking in a pan, especially when sautéing or searing, overcrowding is a common mistake. Instead of browning, the food releases moisture and begins to steam. This prevents the development of that rich, caramelized flavor that makes food truly delicious. Giving ingredients space allows heat to circulate properly and creates better texture and taste. You’re Not Using Enough Heat—or Using Too Much Heat control is one of the most important yet misunderstood aspects of cooking. Cooking at too low a temperature can result in soggy vegetables or pale, lifeless meat. On the other hand, heat that’s too high can burn the outside while leaving the inside undercooked. Learning when to use high heat for searing and when to reduce it for gentle cooking is essential for consistent results. You’re Skipping the Prep Stage Many cooking mistakes happen before the stove is even turned on. Failing to prepare ingredients in advance leads to rushed cooking, uneven cuts, and forgotten steps. Taking a few minutes to measure, chop, and organize your ingredients—often referred to as mise en place—makes the entire process smoother and more enjoyable. It also reduces stress and helps you stay in control. You’re Not Tasting as You Go Cooking without tasting is like writing without reading. If you wait until the end to taste your dish, it may be too late to fix seasoning or balance. Tasting throughout the process allows you to adjust salt, acidity, sweetness, or spice gradually, resulting in a more balanced final dish. You’re Ignoring Texture Flavor is important, but texture plays an equally significant role in how we experience food. Overcooked vegetables become mushy, undercooked grains feel unpleasant, and improperly cooked proteins can be tough. Paying attention to how food feels—not just how it tastes—can elevate your cooking instantly. You’re Rushing the Process Good cooking takes time. Whether it’s allowing meat to brown properly, letting onions caramelize, or giving dough time to rest, rushing often leads to disappointing results. Patience allows flavors to develop fully and textures to improve. Slowing down, even slightly, can make a noticeable difference. You’re Not Letting Food Rest Cutting into meat immediately after cooking or serving dishes straight from the oven without rest can ruin their texture. Resting allows juices to redistribute and structures to set, leading to a better overall result. It’s a small step, but one that professionals never skip. Cooking mistakes are part of the learning process, but they don’t have to hold you back. By paying attention to seasoning, heat, preparation, and timing, you can avoid the most common pitfalls and dramatically improve your results. Great cooking isn’t about perfection—it’s about awareness. Once you understand what might be going wrong, you gain the ability to fix it, adapt, and ultimately create meals that are more flavorful, balanced, and satisfying every time you step into the kitchen.
Biggest Cooking Errors That Ruin Your Meals
Even experienced home cooks occasionally end up with meals that do not taste as good as they imagined. Often, it’s not the recipe that’s at fault—it’s small, common errors that subtly sabotage flavor, texture, or presentation. By understanding the biggest mistakes people make in the kitchen, you can avoid them and elevate your cooking instantly. 1. Skipping Proper Prep One of the most overlooked mistakes is failing to prepare ingredients before cooking. Chopping unevenly, measuring haphazardly, or not having everything on hand leads to rushed cooking and inconsistent results. Taking a few minutes for mise en place—prepping all ingredients ahead of time—ensures smoother execution and prevents last-minute panic. 2. Not Seasoning Correctly Under-seasoning is a leading cause of bland meals, while over-seasoning can overpower delicate flavors. Many home cooks wait until the end to add salt or seasoning, missing the opportunity to layer flavors throughout cooking. Proper seasoning, combined with acid (like lemon or vinegar), balances taste and brings out the natural flavor of ingredients. 3. Cooking at the Wrong Temperature Temperature mistakes ruin both proteins and vegetables. Too high a heat can burn the outside while leaving the inside undercooked; too low a heat prevents proper browning or caramelization. Understanding when to use high heat for searing versus medium or low heat for gentle cooking is essential for consistent, flavorful results. 4. Overcrowding Pans Crowding the pan leads to steaming rather than searing. When ingredients don’t have space, they release moisture that prevents caramelization, leaving vegetables limp or meat soggy. Cooking in batches ensures each piece gets evenly browned and full flavor. 5. Ignoring Rest Times Many cooks serve meat, bread, or other dishes immediately after cooking. Resting is crucial—it allows juices to redistribute, proteins to set, and flavors to develop. Skipping this step often leads to dry meat, runny juices, or collapsed baked goods. 6. Overcooking or Undercooking Proteins Timing is everything when it comes to meat, fish, or poultry. Overcooking makes proteins dry and tough; undercooking can be unsafe and unappetizing. Using a thermometer and paying attention to visual and tactile cues ensures perfectly cooked proteins every time. 7. Neglecting Texture Flavor isn’t everything; texture defines the eating experience. Overcooked vegetables, mushy grains, or rubbery proteins can ruin a meal even if the seasoning is perfect. Aim for crisp-tender vegetables, tender but firm proteins, and properly cooked starches to make each bite enjoyable. 8. Not Tasting as You Go Cooking without tasting is like writing a story without proofreading. Waiting until the end to adjust flavors can result in unbalanced dishes. Taste throughout the cooking process and adjust salt, acid, or seasoning gradually to achieve harmony. 9. Using Dull Knives A dull knife isn’t just frustrating—it can damage ingredients and create uneven cuts, which affects cooking times and textures. Keeping knives sharp improves efficiency, safety, and the final appearance of your dish. 10. Relying Too Heavily on Recipes Recipes are helpful guides, but blindly following them without considering ingredient quality, personal taste, or cooking conditions can lead to mediocre results. Understanding the principles behind techniques allows you to adapt and correct mistakes in real time. Avoiding these common errors is the fastest way to improve your cooking. By focusing on preparation, seasoning, temperature, texture, and mindful adjustments, you can transform everyday meals into consistently delicious dishes. Great cooking isn’t about complicated recipes—it’s about awareness, technique, and attention to detail. Once you eliminate these mistakes, every meal has the potential to shine.
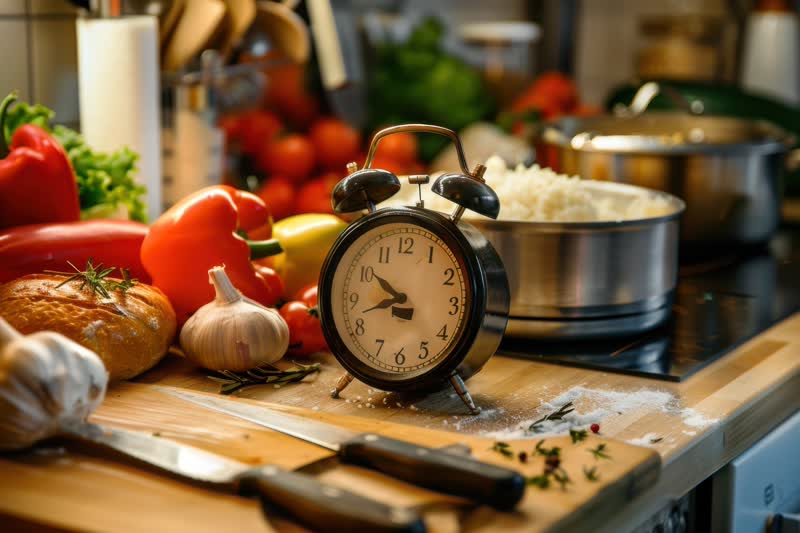
Time-Saving Cooking Tips for Busy People
In our busy modern lives, carving out time to cook often feels impossible. Between work, family, and other commitments, preparing healthy, flavorful meals often takes a backseat. The good news is that cooking efficiently doesn’t mean sacrificing quality or taste. With a few smart strategies and kitchen hacks, anyone can save time while still enjoying homemade meals. 1. Plan Ahead Meal planning is the single most effective way to save time in the kitchen. Take a few minutes each week to decide what you’ll cook, make a shopping list, and prepare ingredients in advance. Knowing exactly what you need and what steps to follow reduces last-minute stress and wasted trips to the store. 2. Use Mise en Place Professional chefs swear by mise en place, which means “everything in its place.” Chop vegetables, measure spices, and have all your ingredients ready before you start cooking. This approach minimizes downtime and ensures a smooth workflow, especially when preparing complex meals. 3. Batch Cook and Freeze Cooking in bulk saves hours throughout the week. Prepare large quantities of staples like grains, beans, or sauces, and store them in the fridge or freezer. With pre-cooked ingredients on hand, assembling meals becomes much faster and easier. These dishes—soups, stews, and casseroles—are ideal for freezing and storing. 4. Embrace One-Pot and Sheet-Pan Meals Simplify cooking and cleanup by using one-pot dishes or sheet-pan meals. These methods allow you to cook proteins, vegetables, and grains together, cutting down on both time and dishes. Plus, flavors meld beautifully when ingredients cook together in one vessel. 5. Invest in Time-Saving Tools A few key kitchen tools can dramatically reduce cooking time. Sharp knives make prep faster, food processors and mandolins handle chopping and slicing in seconds, and pressure cookers or instant pots can cook dishes in a fraction of the traditional time. 6. Keep Ingredients Simple Complex recipes with long ingredient lists take time. Focus on recipes with a handful of high-quality ingredients. Simple seasonings and fresh produce often create the most flavorful meals without hours of prep. 7. Cook Smart, Not Hard Multitasking is key when time is limited. While grains or proteins cook, prep vegetables, make a quick sauce, or clean up. Using the stove and oven simultaneously can also maximize efficiency, but keep an eye on cooking times to avoid overcooking. 8. Use Leftovers Creatively Transform leftovers into new meals instead of letting them go to waste. Roasted vegetables can become a hearty salad, cooked grains can be turned into stir-fries, and proteins can be shredded for sandwiches or tacos. Creative reuse saves both time and money. 9. Clean as You Go Spending hours scrubbing pots and pans after cooking is a big time drain. Clean up while you cook—wash utensils, wipe surfaces, and put away ingredients as you finish with them. A tidy workspace speeds up meal prep and makes the overall experience more enjoyable. 10. Keep a Go-To List Have a shortlist of favorite quick meals ready for busy days. Whether it’s a stir-fry, pasta with a simple sauce, or a grain bowl, having reliable, fast recipes you know by heart reduces decision fatigue and speeds up cooking. Time-saving cooking isn’t about shortcuts that compromise taste; it’s about planning, preparation, and smart techniques. By organizing your kitchen, batch-cooking staples, multitasking efficiently, and using the right tools, even the busiest people can enjoy homemade meals without stress. With a few small adjustments, cooking can become faster, easier, and more satisfying every day.
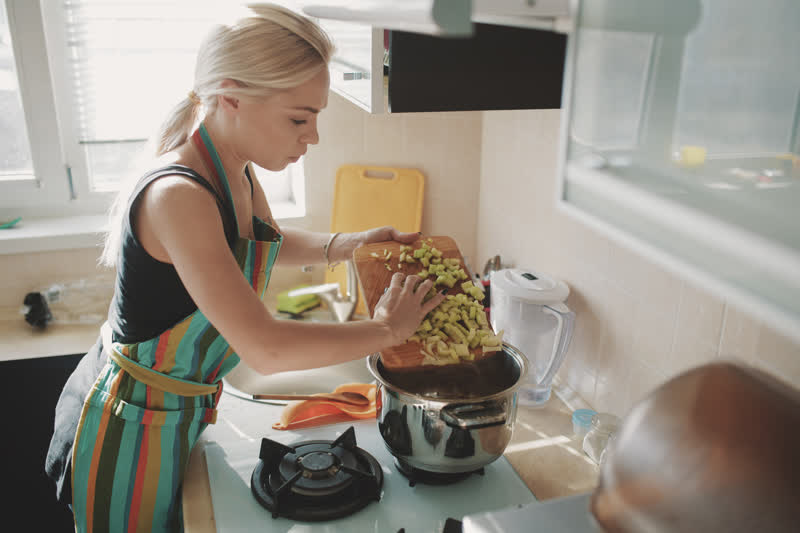
Small Cooking Changes That Make a Big Difference
Improving your cooking does not always require new gadgets, expensive ingredients, or complicated recipes. Often, the difference between a mediocre dish and a truly memorable one comes down to a few small adjustments that enhance flavor, texture, and efficiency. Understanding and implementing these subtle changes can elevate everyday meals and make home cooking feel more professional. Season Throughout Cooking One of the simplest yet most impactful adjustments is proper seasoning. Rather than adding salt or spices only at the end, layer seasoning throughout the cooking process. For example, salting meat before cooking allows flavors to penetrate, while seasoning vegetables during sautéing encourages even flavor development. Acids, like lemon juice or vinegar, can be added mid-cooking or at the finish to brighten flavors and balance richness. Master Heat Control Temperature plays a critical role in cooking. Overcrowding pans, cooking on too low or too high heat, or failing to preheat can all compromise flavor and texture. Giving ingredients space, allowing pans to reach the correct temperature, and adjusting heat as necessary ensures proper caramelization, even cooking, and enhanced taste. Small awareness in this area often yields dramatic improvements. Emphasize Texture Even the best-flavored dishes can feel underwhelming if texture is ignored. Overcooked vegetables, undercooked grains, or tough proteins diminish the dining experience. By paying attention to cooking times and methods—such as searing proteins for a crisp exterior or keeping vegetables al dente—you can create dishes that are as enjoyable to bite into as they are to taste. Layer Flavors Complex flavor doesn’t require complexity in ingredients. Layering aromatics, spices, and fresh elements throughout cooking builds depth. Start with foundational flavors like garlic and onions, add spices during the cooking process, and finish with fresh herbs or citrus. This technique transforms simple dishes into meals with a balanced, dynamic taste profile. Rest and Timing Resting is another often-overlooked step that significantly impacts results. Allowing meat, baked goods, or even cooked grains to rest before serving allows flavors to settle and juices to redistribute. Timing your cooking steps to include rest periods ensures the final dish achieves optimal texture and taste. Even minor adjustments like proper seasoning, mindful heat control, attention to texture, flavor layering, and allowing food to rest can have a significant impact on the outcome of your meals. These changes require no specialized equipment—just awareness and intention. By focusing on these small but powerful habits, home cooks can consistently produce dishes that are flavorful, balanced, and satisfying.
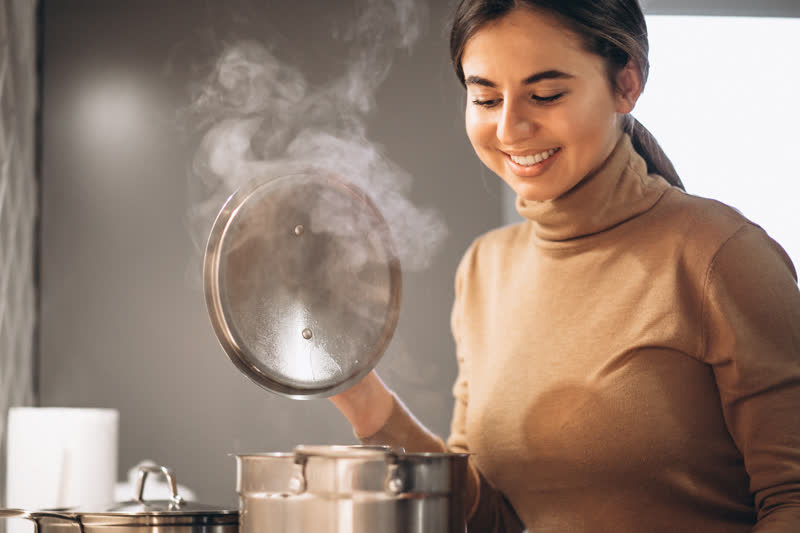
Understanding Heat: The Key to Better Cooking
One of the most important, yet often overlooked, factors in cooking is heat. Whether you’re searing a steak, sautéing vegetables, or simmering a sauce, understanding how heat interacts with ingredients can transform your dishes. Mastering heat control is not about memorizing exact temperatures—it’s about recognizing how different methods affect flavor, texture, and cooking time. The Role of Heat in Cooking Heat is the driving force behind chemical and physical changes in food. Proteins coagulate, sugars caramelize, and starches gelatinize—all at specific temperatures. Too much heat can burn or dry out food, while too little can leave dishes undercooked or flavorless. Recognizing the impact of heat allows cooks to make intentional adjustments, ensuring consistently better results. Direct vs. Indirect Heat Various cooking techniques transfer heat to food in distinct ways. Direct heat, such as grilling or searing, cooks the surface of food quickly and creates Maillard browning, which adds depth of flavor. Indirect heat, like roasting or slow simmering, cooks more evenly and gently, allowing interior textures to develop without overcooking the exterior. Choosing the right method for your ingredient is essential for achieving the desired outcome. High Heat: Flavor and Texture High heat is ideal for techniques that require rapid cooking or browning. Searing meat or stir-frying vegetables at high temperature produces a crisp exterior and rich flavor while locking in moisture. However, high heat requires attention—food can burn quickly, and timing becomes critical. Using oils with a high smoke point, such as avocado or grapeseed oil, helps prevent unwanted flavors. Medium and Low Heat: Control and Depth Medium heat provides more control, making it suitable for pan sauces, sautéing, or cooking delicate proteins. Low heat is perfect for slow cooking, simmering, or melting chocolate. It allows flavors to develop gradually and prevents scorching. Understanding when to adjust heat levels prevents common cooking errors and maximizes taste. Tips for Mastering Heat Preheat Properly: Allow pans and ovens to reach the desired temperature before adding ingredients. Adjust Gradually: Small adjustments in heat often have a bigger impact than sudden changes. Know Your Cookware: Different materials conduct heat differently—cast iron holds heat well, while stainless steel heats unevenly. Observe Your Food: Visual and sensory cues, like browning or sizzling, often indicate whether your heat is appropriate. Understanding and controlling heat is a fundamental skill that improves every aspect of cooking. From perfectly seared meats to tender vegetables and flavorful sauces, mastering heat allows you to cook with confidence and achieve consistently excellent results. By paying attention to how heat affects ingredients, home cooks can elevate simple meals into dishes with professional-quality flavor and texture.
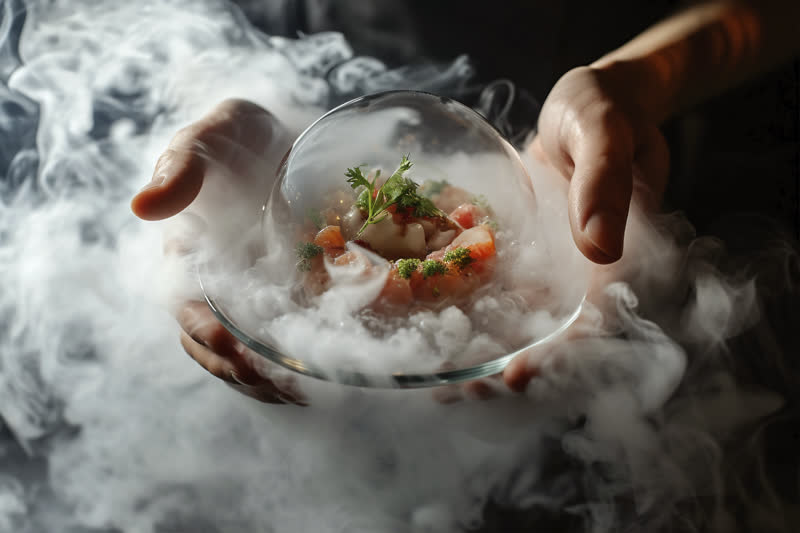
The Science Behind Great Cooking
Cooking is often seen as an art, but at its core, it is a science. Understanding the chemical and physical reactions that occur during cooking can transform ordinary meals into extraordinary ones. By knowing why ingredients behave the way they do, you can make better decisions in the kitchen, improve flavors, and achieve consistent results. Proteins: Structure and Coagulation Proteins, found in meat, eggs, and dairy, change their structure when exposed to heat. As they cook, proteins denature and coagulate, transforming from liquid or raw forms into firm, solid structures. This process explains why eggs solidify when boiled and why meat firms up as it cooks. Overcooking can cause proteins to tighten excessively, squeezing out moisture and leaving meat dry. Controlling cooking time and temperature is key to perfect texture. Caramelization and the Maillard Reaction Sugars and amino acids react under heat to create complex flavors and appealing browning. Caramelization occurs when sugars break down and develop sweet, nutty flavors, while the Maillard reaction—responsible for browning meat, bread crusts, and roasted vegetables—produces rich, savory notes. Proper heat control is essential: too low, and the reaction doesn’t occur; too high, and food can burn. Starches and Gelatinization Starches, found in grains, potatoes, and legumes, absorb water and swell when heated, a process called gelatinization. This is why pasta becomes tender when boiled and why sauces thicken when flour or cornstarch is added. Understanding the timing and temperature of gelatinization prevents mushy or undercooked results. Fats: Flavor Carriers and Texture Enhancers Fats not only enhance flavor but also affect texture and cooking chemistry. Oils with high smoke points allow high-temperature searing without burning, while butter adds richness but burns faster at high heat. Fats also carry fat-soluble flavors and aromas, making dishes taste fuller and more balanced. Acids and Bases: Balancing Flavors Using acids such as lemon, vinegar, or wine brightens dishes and loosens protein structures, improving meat texture. Bases, though less commonly used, affect texture and pH, such as in baking where baking soda creates lift and browning. A basic understanding of pH in cooking can help balance dishes and enhance flavor harmony. Timing and Temperature Control Science also explains why timing and temperature are crucial. Heat drives chemical reactions, so controlling both ensures proper flavor development, texture, and doneness. Observing visual cues, using thermometers, and understanding how heat moves through different ingredients allows cooks to manipulate results with precision. Great cooking is as much about understanding science as it is about creativity. By learning how proteins coagulate, sugars caramelize, starches gelatinize, fats enhance flavor, and acids balance taste, home cooks can consistently produce dishes that are flavorful, perfectly textured, and visually appealing. Mastery in the kitchen begins with knowledge—science is the foundation of every great meal.

Kitchen Mistakes That Are Sabotaging Your Cooking
Even the most enthusiastic home cooks encounter mistakes that can affect flavor, texture, and overall results. Many of these errors are small and easily corrected, but they can turn a promising dish into a disappointment. Understanding the most common pitfalls—and how to prevent them—can elevate everyday cooking and help you achieve consistent, delicious meals. 1. Overcrowding the Pan Crowding a pan is one of the most frequent mistakes when sautéing or searing. When ingredients are too close together, they release moisture and steam instead of browning. The solution is simple: cook in batches or use a larger pan to give food room to sear, creating caramelization and richer flavors. 2. Skipping Seasoning Under-seasoned dishes are often bland, while over-seasoning can overpower subtle flavors. The key is to season progressively—adding salt, pepper, and spices at multiple stages of cooking. Layering seasoning allows flavors to develop fully and makes the dish taste more balanced. 3. Ignoring Heat Control Cooking at the wrong temperature is another common problem. Too high heat can burn the outside while leaving the inside undercooked, whereas too low heat prevents proper browning or flavor development. Adjusting heat based on the ingredient and technique ensures even cooking and optimal results. 4. Not Tasting as You Go Waiting until the end to taste a dish often leads to imbalance. Sampling while cooking allows you to adjust seasoning, acidity, or spice gradually, rather than trying to fix issues after the fact. Regular tasting is an essential habit for achieving well-rounded flavors. 5. Overcooking or Undercooking Proteins Timing is critical for meat, poultry, and fish. Overcooking leads to dryness and toughness, while undercooking can make food unsafe or unappetizing. Using a thermometer, observing visual cues, and understanding cooking times for different proteins can prevent this common error. 6. Neglecting Prep Work Failing to prepare ingredients in advance—chopping, measuring, and organizing—can lead to rushed cooking and inconsistent results. Adopting a mise en place approach ensures smoother execution and reduces the risk of mistakes mid-recipe. 7. Mismanaging Resting Times Many home cooks skip resting meat or baked goods, which affects texture and moisture. Resting allows juices to redistribute and dishes to set, resulting in a more enjoyable eating experience. Even a short rest can make a significant difference. 8. Ignoring Texture Flavor is only part of the equation. Paying attention to texture—crispness, tenderness, or chewiness—is essential. Overcooked vegetables, rubbery proteins, or mushy grains can undermine a dish, even if seasoning is perfect. Cooking with texture in mind creates a more satisfying meal. Avoiding these common mistakes doesn’t require advanced techniques or expensive tools—it requires awareness, timing, and careful observation. By adjusting seasoning, controlling heat, prepping ingredients properly, and respecting resting times, you can turn everyday cooking into consistently flavorful and enjoyable meals. Understanding these pitfalls and correcting them is a key step toward becoming a more confident and skilled home cook.
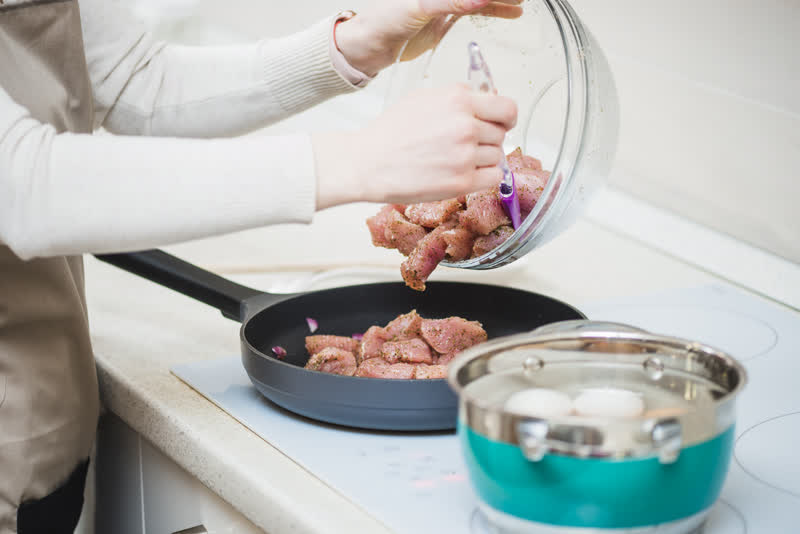
How to Cook Proteins Without Drying Them Out
Cooking protein - whether meat, poultry, or fish - can be intimidating. Overcooked meat becomes dry and tough, while undercooked proteins are unsafe or unappetizing. The key to perfectly cooked proteins lies in understanding the science of heat, moisture, and timing. By mastering a few techniques, you can ensure juicy, flavorful results every time. Understanding Protein and Moisture Proteins are made of tightly coiled strands that contract when heated. If exposed to heat for too long, these strands squeeze out moisture, leaving meat dry. Conversely, proper temperature control keeps proteins tender while preserving their natural juices. Fish, eggs, and lean cuts of meat are particularly sensitive, while fattier cuts can tolerate slightly higher heat without drying out. Choose the Right Cooking Method Searing and Pan-Frying: High heat creates a flavorful crust, but the internal temperature must be monitored closely. Braising and Slow Cooking: Ideal for tougher cuts, these methods use moisture and low heat to break down connective tissue while keeping the meat tender. Grilling: Works well for medium-fat meats but requires attention to avoid flare-ups and overcooking. Poaching and Steaming: Gentle methods that preserve moisture, perfect for delicate proteins like fish or chicken breasts. Control Heat and Timing Cooking proteins evenly is crucial. Use medium heat for thick cuts, high heat for searing, and low heat for gentle cooking. Investing in a meat thermometer ensures accuracy—internal temperatures matter more than cook time alone: Chicken: 165°F (74°C) Beef steak (medium-rare): 130–135°F (54–57°C) Fish: 140°F (60°C) Resting Proteins Letting meat rest after cooking allows juices to redistribute throughout the cut. Cutting too early causes the juices to escape, leaving dry meat. Resting times vary by size: small fillets need only a few minutes, while larger roasts may require 10–15 minutes. Additional Tips Brining or Marinating: Adds moisture and flavor while helping meat stay tender during cooking. Avoid Overcrowding: Crowded pans release moisture and steam instead of searing. Slice Against the Grain: Shortens muscle fibers, making meat easier to chew and feel more tender. By understanding protein structure, controlling heat, choosing the right cooking method, and allowing proper resting time, home cooks can consistently produce juicy, flavorful proteins. These strategies turn everyday meals into dishes that taste restaurant-quality, without guesswork or trial-and-error.
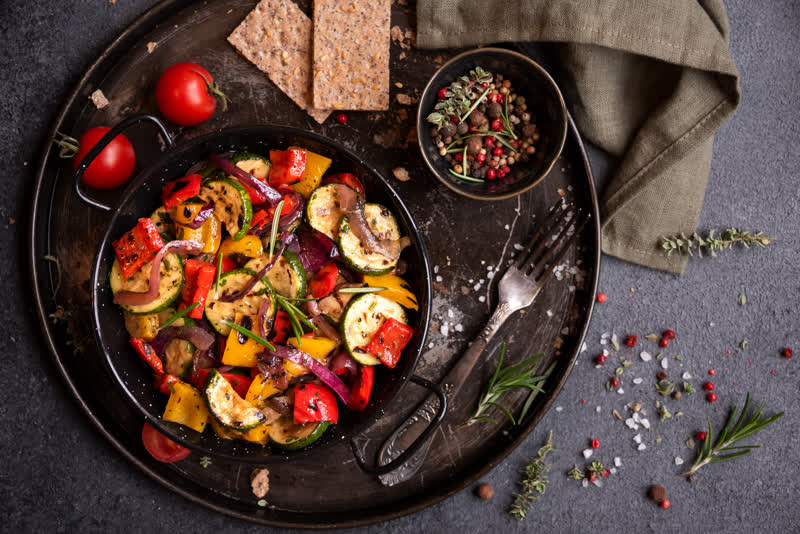
Simple Techniques That Make Your Meals Look and Taste Professional
Creating meals that look and taste like they came from a restaurant does not require expensive ingredients or advanced culinary training. Often, it’s small, intentional techniques that elevate both presentation and flavor. By focusing on a few key principles—plating, seasoning, texture, and timing—you can make everyday dishes feel extraordinary. Prioritize Seasoning and Layering Flavors Professional chefs know that flavor develops in layers. Rather than adding all seasoning at the end, season at multiple stages: while prepping, during cooking, and just before serving. Incorporate acids, fresh herbs, and complementary spices to enhance natural flavors. Small adjustments like finishing a dish with a squeeze of lemon or a drizzle of high-quality olive oil can make a huge difference. Pay Attention to Texture Texture transforms a dish from ordinary to refined. Combining soft, creamy, and crunchy elements creates a more interesting eating experience. For example, topping a smooth puree with roasted vegetables, toasted nuts, or crispy herbs adds both flavor and visual appeal. Similarly, properly cooked proteins with a seared crust contrast beautifully with tender interiors. Master Heat Control How you apply heat directly affects both taste and appearance. High heat techniques, such as searing, roasting, or broiling, create caramelization and appealing color. Gentle heat methods, like poaching or slow cooking, preserve moisture and tenderness. Recognizing when to adjust heat ensures your dishes are flavorful, evenly cooked, and visually inviting. Focus on Presentation Even the simplest meal can look professional with careful plating. Use clean edges, contrasting colors, and thoughtful arrangement. Small touches—like a fresh herb garnish, a sprinkle of seeds, or a drizzle of sauce—draw the eye and signal attention to detail. White plates often enhance color contrast, while arranging ingredients with height and spacing adds sophistication. Timing and Mise en Place Organization is crucial. Preparing ingredients ahead of time (mise en place) allows for smooth execution and precise timing. Coordinating cooking so that all components are ready simultaneously prevents overcooked proteins or wilted vegetables, ensuring your meal is fresh and visually appealing. Professional-looking meals are less about complexity and more about intention. By layering flavors, managing texture, controlling heat, and presenting thoughtfully, even everyday dishes can reach restaurant-quality standards. With these simple techniques, home cooks can impress both in taste and appearance without unnecessary effort or fancy equipment.
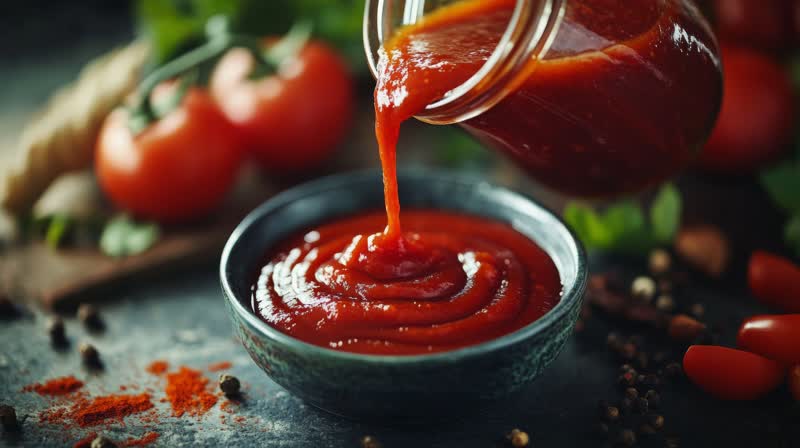
Why Your Sauces Don’t Taste Right
A good sauce can elevate a dish from ordinary to exceptional, yet it is one of the most common elements that home cooks struggle to master. Too thin, too bland, too acidic, or too salty—sauces are delicate balances of flavor, texture, and timing. Understanding why your sauces fail and how to correct them is key to consistently delicious results. 1. Underseasoning or Layering Flavors Incorrectly A common mistake is adding all the seasoning at the end of cooking. Flavors develop gradually, so seasoning in stages—while cooking aromatics, during reduction, and at finishing—ensures depth. Herbs, spices, and acids should be introduced thoughtfully rather than dumped all at once. 2. Using the Wrong Base A sauce is only as good as its foundation. Relying on pre-made stocks or overly diluted liquids can result in weak flavors. Homemade or high-quality stocks, concentrated reductions, or flavorful cooking liquids provide a robust base that makes sauces taste intentional rather than flat. 3. Improper Thickening Techniques Sauces often fail when texture is off. Too thin, and they lack body; too thick, and they feel heavy. Common errors include over-reducing, undercooking roux, or adding starch incorrectly. Gradual thickening, tasting as you go, and understanding the science behind gelatinization ensures a perfectly balanced sauce. 4. Temperature Mismanagement Sauces can lose flavor or break if exposed to the wrong heat. Dairy-based sauces curdle under high heat, emulsions separate, and delicate reductions can burn. Cooking gently, controlling heat, and finishing at the correct temperature preserves both flavor and consistency. 5. Ignoring Acidity and Balance Even a well-cooked sauce can taste flat without proper balance. Acidity—via lemon, vinegar, or wine—brightens flavors and balances richness. Sweetness, salt, and umami should also be calibrated. Tasting continuously and adjusting gradually is essential for a harmonious sauce. 6. Not Resting or Finishing Properly Some sauces benefit from resting briefly off the heat to allow flavors to meld. Finishing touches, such as adding fresh herbs, a pat of butter, or a drizzle of oil, can elevate the sauce, adding both sheen and depth. Perfecting sauces is a combination of technique, timing, and attention to flavor balance. By layering seasonings, using quality bases, controlling heat, and adjusting acidity and texture, even simple sauces can taste sophisticated and professional. With practice, home cooks can transform everyday meals into dishes that feel restaurant-ready, one sauce at a time.

Quick Breakfast Hacks for Busy Mornings
Mornings are often the busiest part of the day, but skipping breakfast should not be the default. With smart planning, simple prep strategies, and a few clever shortcuts, you can enjoy nutritious, satisfying meals—even when time is tight. These quick breakfast hacks make it easy to eat well without slowing down your morning routine. Prep Once, Save Time All Week Spending a little time on meal prep can save precious minutes during hectic mornings. Chop vegetables, portion fruit, cook grains, or make smoothie packs ahead of time. Overnight oats, pre-cooked eggs, and ready-to-go yogurt parfaits allow you to grab breakfast without any last-minute stress. Choose Ingredients That Work Hard Opt for ingredients that are flexible and work in a variety of dishes. Whether scrambled, poached, or baked into a frittata, eggs adapt easily to any breakfast. Greek yogurt works as a base for parfaits, smoothies, or overnight oats. Fruits like bananas, berries, or frozen mango add sweetness, flavor, and nutrients across multiple dishes. Cook Smart, Not Longer Use cooking methods that save time without sacrificing quality. Microwaves, toaster ovens, and skillets can help you cook multiple components simultaneously. For example, steam veggies while heating pre-cooked grains, or warm frozen fruit for a quick oatmeal topping. Efficient cooking techniques make breakfast fast, fresh, and stress-free. Keep Healthy Staples on Hand Stocking your kitchen with convenient, nutritious ingredients ensures you can always assemble a balanced breakfast in minutes. Whole-grain bread, nut butters, canned beans, frozen vegetables, and pre-washed greens are simple shortcuts that don’t compromise flavor or nutrition. Layer Flavors and Textures Even a quick breakfast can feel indulgent with thoughtful layers and textures. Add crunch with nuts or granola, freshness with herbs or berries, and creaminess with yogurt or avocado. Small touches—like a sprinkle of chili flakes or a drizzle of olive oil—turn ordinary meals into something special. Balance for Lasting Energy A good breakfast combines protein, healthy fats, and fiber-rich carbs. This mix keeps you full longer and stabilizes energy. Quick options like eggs with whole-grain toast, smoothie bowls, or yogurt with fruit and nuts are both fast to prepare and nutritionally complete. With a little preparation, smart ingredient choices, and efficient cooking, busy mornings don’t have to mean skipping breakfast or settling for something boring. These quick breakfast hacks make it easy to eat well, save time, and start the day energized.
Why Your Pancakes or Waffles Don’t Turn Out Right
Pancakes and waffles are breakfast classics, yet many home cooks struggle to get them light, fluffy, and evenly cooked. Flat pancakes, dense waffles, or uneven browning are common frustrations—but most problems can be traced back to a few simple mistakes in the batter and cooking process. Understanding these pitfalls can help you consistently create breakfast perfection. 1. Don’t Overmix the Batter Overmixing is one of the biggest mistakes. Stir your ingredients just until combined—small lumps are perfectly fine. Overworking the batter develops gluten, which makes pancakes and waffles dense and heavy instead of tender and airy. Gentle mixing is key to achieving that signature fluffiness. 2. Check Your Leavening Agents Baking powder and baking soda are essential for rise and light texture. Using expired, incorrectly measured, or unevenly distributed leavening can result in flat or heavy pancakes and waffles. Always measure carefully and verify that your ingredients are fresh for the best lift. 3. Heat Matters Temperature affects both browning and internal cooking. Cooking on a surface that’s too cold produces pale, undercooked centers, while excessive heat burns the exterior before the middle cooks. Preheat pans or waffle irons properly and adjust the heat as needed to achieve golden, evenly cooked results. 4. Get the Right Batter Consistency The consistency of your batter makes a big difference. Thick batter yields heavy, dense pancakes; thin batter spreads too much and can cook unevenly. Adjust liquid gradually to reach a pourable but not runny texture that holds its shape on the griddle or in the waffle iron. 5. Let the Batter Rest A short resting period of 5–10 minutes allows flour to hydrate and leavening agents to activate. This simple step results in lighter, fluffier pancakes and waffles. Skipping it can leave your breakfast flatter and less tender. 6. Grease Wisely Too much or too little fat affects browning and texture. Lightly coat your pan or waffle iron with oil, butter, or nonstick spray. This prevents sticking while producing a golden crust without making the final product greasy. By paying attention to mixing, leavening, heat, batter consistency, resting, and greasing, you can consistently turn out pancakes and waffles that are fluffy, golden, and perfectly cooked. With a few mindful adjustments, your breakfast classics can feel professional—even on busy mornings.
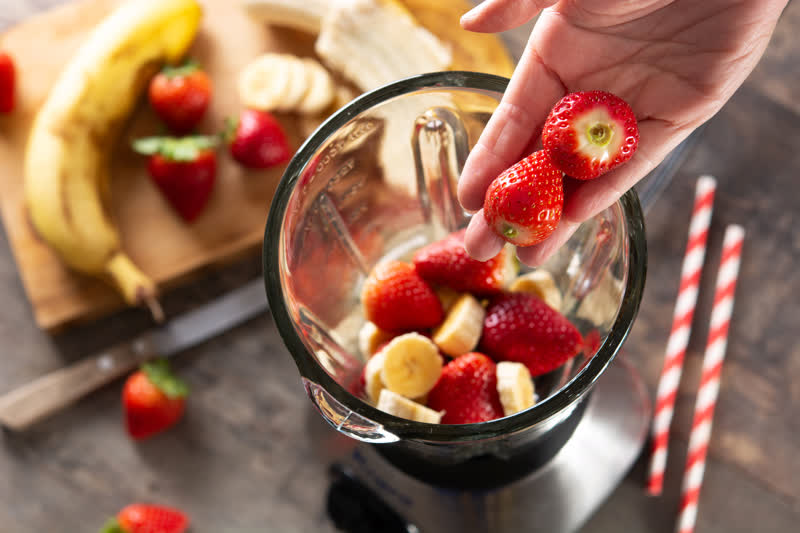
Mastering Smoothies and Bowls: Flavor Tips for Morning Meals
Smoothies and breakfast bowls are more than just convenient meal - they are a canvas for flavor, texture, and nutrition. Yet many home cooks struggle to make them taste vibrant and balanced rather than bland or overly sweet. Understanding flavor layering, ingredient combinations, and textural contrasts can turn everyday morning meals into something both nourishing and delicious. 1. Balance Sweetness, Acidity, and Bitterness A common mistake is overloading smoothies or bowls with sweet ingredients like fruit or sweetened yogurt. To avoid cloying flavors, balance sweetness with a touch of acidity or bitterness. A squeeze of lemon, a few frozen berries, or a handful of leafy greens adds brightness and complexity, making your morning meal more satisfying. 2. Combine Complementary Textures Texture transforms a simple smoothie or bowl into a more engaging experience. Blend creamy bases such as yogurt, avocado, or bananas with crunchy toppings like granola, seeds, or toasted nuts. Adding chewy or crisp elements creates contrast and keeps each bite interesting. 3. Choose Ingredients That Pack Flavor Use ingredients with bold or concentrated flavors to avoid bland results. Frozen fruits preserve flavor and sweetness, while spices like cinnamon, nutmeg, or vanilla extract enhance depth. Natural nut butters, cocoa nibs, or citrus zest can also elevate taste without adding refined sugar. 4. Layer Ingredients Thoughtfully How you combine ingredients affects both taste and appearance. Start with a flavorful liquid base (milk, yogurt, or juice), add frozen or fresh fruits, then top with garnishes for contrast. Layering ensures even flavor distribution and creates visually appealing bowls that look as good as they taste. 5. Mind the Consistency Smoothie thickness can make or break the experience. Too thin, and it feels watery; too thick, and it’s difficult to sip. Adjust liquids gradually and use ingredients like oats or chia seeds to naturally thicken, achieving a texture that’s both satisfying and easy to eat. 6. Prep for Convenience Pre-portion smoothie packs or breakfast bowl ingredients to save time on busy mornings. Store in the freezer or fridge so that you can blend or assemble in minutes. Quick prep ensures you don’t sacrifice nutrition or flavor when mornings are rushed. With attention to flavor balance, texture, ingredient quality, and thoughtful layering, smoothies and bowls can become a highlight of your morning routine. These simple tips help home cooks transform everyday breakfasts into meals that are not only quick and nutritious but also vibrant, flavorful, and Instagram-worthy.
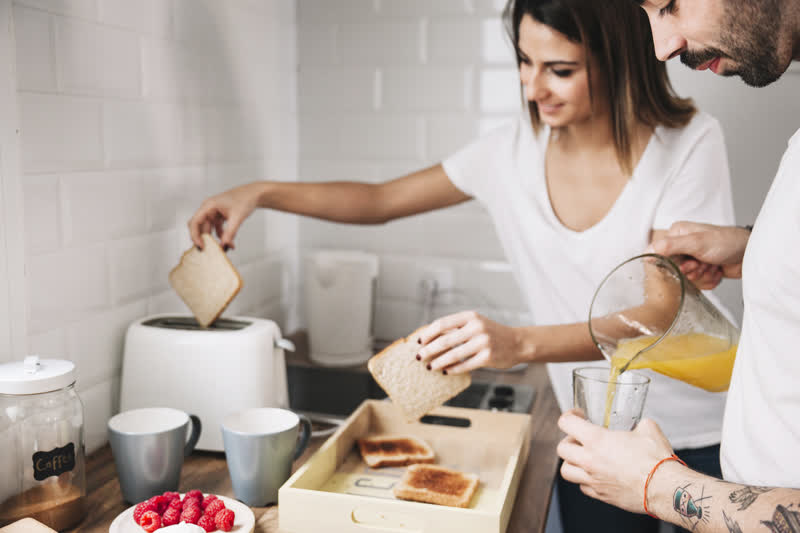
Breakfast Prep Tips That Save You Time and Stress
Mornings can be hectic, but a little planning goes a long way in making breakfast quick, easy, and stress-free. With the right strategies, you can prepare nutritious meals without rushing, skipping ingredients, or relying on takeout. Breakfast prep is all about organization, smart ingredient choices, and efficient techniques that set you up for a smooth morning routine. 1. Plan Ahead for the Week Taking just 10–15 minutes on Sunday to plan your breakfasts can save hours during the week. Decide what meals you’ll make, portion ingredients, and prep anything that can be stored in the fridge or freezer. Planning reduces morning indecision and ensures you have everything you need within reach. 2. Pre-Chop and Portion Ingredients Chopping fruits, vegetables, or proteins ahead of time makes assembly quick and stress-free. Portion smoothie ingredients, overnight oats, or frittata fillings into containers so that mornings require minimal effort. Prepped ingredients not only save time but also encourage healthy choices. 3. Use Make-Ahead Meals Certain breakfast items work perfectly for batch cooking. Muffins, breakfast sandwiches, egg muffins, and granola can all be made in advance and stored for the week. Reheating or assembling pre-made items takes minutes, giving you a fast yet satisfying start to your day. 4. Organize Your Kitchen for Efficiency Keep frequently used breakfast items—oats, eggs, frozen fruit, and nut butters—within easy reach. Group similar ingredients together and designate specific containers for grab-and-go items. A well-organized kitchen minimizes stress and makes mornings flow smoothly. 5. Embrace Multi-Tasking Cooking Cook multiple components at once to save time. For example, steam vegetables while toasting bread, or prepare smoothie bases while eggs cook. Layering tasks efficiently ensures your breakfast is ready faster without compromising quality. 6. Focus on Quick, Balanced Meals Prioritize recipes that combine protein, healthy fats, and fiber-rich carbs. Overnight oats with nuts and berries, smoothies with Greek yogurt, or avocado toast with eggs are quick to assemble and keep you full until lunch. Balanced breakfasts reduce mid-morning cravings and keep energy steady. A little breakfast prep goes a long way in saving time, reducing stress, and improving nutrition. By planning, pre-chopping, using make-ahead meals, and organizing your kitchen efficiently, you can enjoy mornings that are smoother, faster, and far more enjoyable. Smart prep transforms your breakfast routine from chaotic to effortless, setting a positive tone for the entire day.
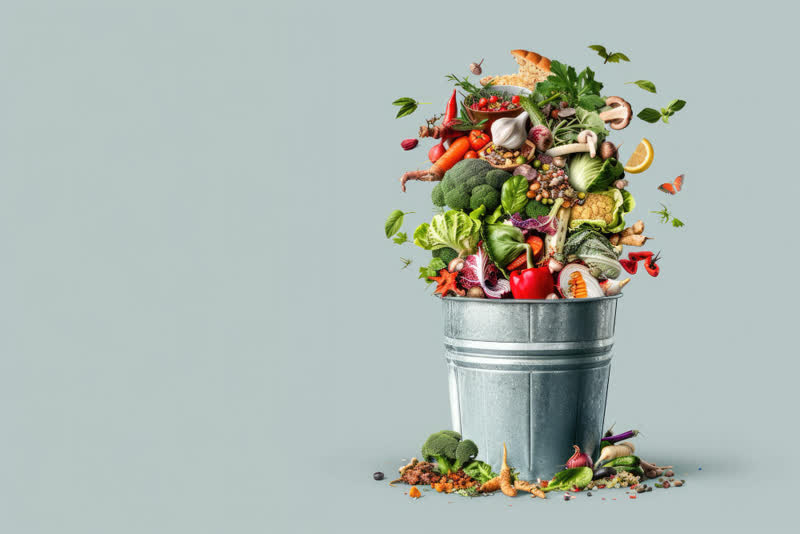
How to Reduce Food Waste in Your Kitchen
Food waste is a common problem in many households, often caused by poor planning, improper storage, or simply forgetting what is already in the fridge. Reducing food waste is not only good for the environment, but it also helps save money and encourages more mindful cooking habits. With a few practical changes, anyone can significantly cut down on wasted food. A useful starting point is becoming more aware of what you already have at home. Before going grocery shopping, take a moment to check your fridge, freezer, and pantry. This helps prevent buying items you do not need and reduces the chances of food being left unused. Creating a simple shopping list based on what is missing can make your purchases more intentional. Planning meals in advance can also make a big difference. Instead of deciding what to cook at the last minute, think about your meals for the next few days. This allows you to use ingredients efficiently and ensures that perishable items are used before they spoil. Flexible meal planning works best, as it gives you room to adjust based on what needs to be used first. Proper storage plays a major role in keeping food fresh for longer. Different foods require different conditions, so understanding how to store fruits, vegetables, and other ingredients can prevent early spoilage. For example, some produce lasts longer in the refrigerator, while others should be kept at room temperature. Keeping your fridge organized also makes it easier to see what needs to be used soon. Another effective approach is using leftovers creatively. Instead of throwing away extra food, think of ways to transform it into a new meal. Cooked vegetables can be added to soups or omelets, while leftover meat can be used in sandwiches, salads, or wraps. This not only reduces waste but also saves time on future cooking. Portion control is another important factor. Preparing too much food often leads to unnecessary waste. Try cooking smaller amounts and saving extra portions only when you know they will be eaten later. Learning to estimate portions more accurately can help reduce leftovers that go uneaten. Freezing food is a practical solution for extending its shelf life. Many ingredients, including cooked meals, bread, and vegetables, can be frozen and used later. Labeling frozen items with dates helps you keep track of how long they have been stored and ensures they are used in time. Finally, changing your mindset around food is essential. Instead of aiming for perfection, focus on making the most of what you have. Slightly imperfect fruits and vegetables are still perfectly usable and often just as nutritious. By becoming more organized, planning ahead, and using ingredients wisely, you can reduce food waste in your kitchen and develop more sustainable cooking habits that benefit both your household and the environment.
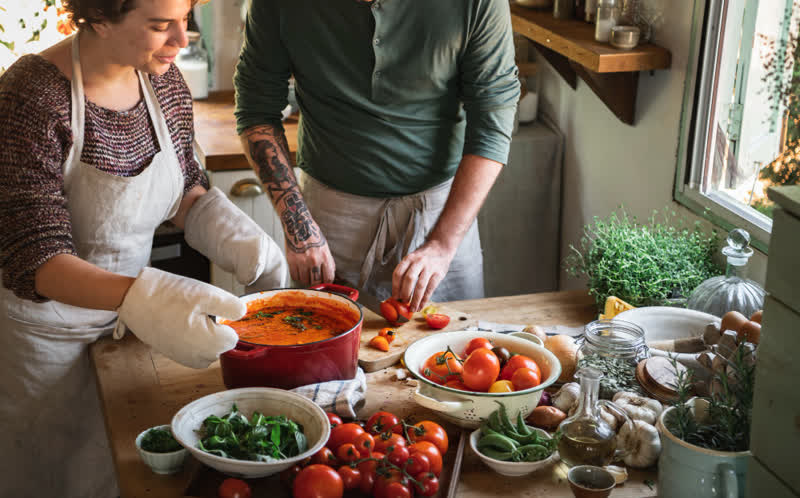
The Psychology of Cooking: Why We Enjoy Homemade Food
Cooking at home is more than just a daily task; it is an experience that engages both the mind and the emotions. Many people find comfort and satisfaction in preparing their own meals, even when it requires time and effort. The enjoyment of homemade food is deeply connected to psychological factors such as creativity, control, memory, and emotional well-being. One of the main reasons people enjoy cooking is the sense of control it provides. When preparing a meal at home, individuals decide what ingredients to use, how the food is prepared, and how it will taste. This level of involvement creates a feeling of ownership and accomplishment. Unlike ordering food or eating out, cooking allows people to shape the entire experience according to their preferences. Creativity also plays an important role. Cooking offers an opportunity to experiment with flavors, textures, and presentation. Even simple meals can become a form of self-expression. Trying new combinations or adjusting a dish based on personal taste can be both exciting and rewarding. This creative aspect keeps cooking interesting and prevents it from feeling repetitive. Another powerful factor is the connection between food and memory. Homemade meals are often associated with family traditions, childhood experiences, and cultural identity. The smell or taste of a particular dish can bring back strong memories and emotions. These associations make home-cooked food feel more meaningful and comforting than meals prepared elsewhere. Cooking can also have a calming effect on the mind. The process of chopping, stirring, and following steps can be almost meditative. Focusing on these tasks helps people disconnect from stress and distractions. For many, spending time in the kitchen becomes a way to relax and regain a sense of balance after a busy day. Sharing food with others further enhances the experience. Preparing a meal for family or friends creates a sense of connection and care. People often associate homemade food with warmth and generosity, which strengthens relationships. Even a simple dish can feel special when it is made and shared with intention. Additionally, cooking at home often leads to healthier eating habits. When individuals prepare their own meals, they are more aware of the ingredients and portion sizes. This awareness can lead to better choices and a stronger connection to what they consume. Finally, the satisfaction of completing a dish should not be underestimated. Seeing the final result and enjoying something you created from scratch brings a sense of pride. This feeling reinforces the desire to cook again and continue improving. In conclusion, the enjoyment of homemade food is not just about taste. It is influenced by creativity, memory, emotional comfort, and social connection. These psychological elements make cooking a meaningful activity that goes beyond simply preparing a meal, turning it into an experience that nourishes both the body and the mind.
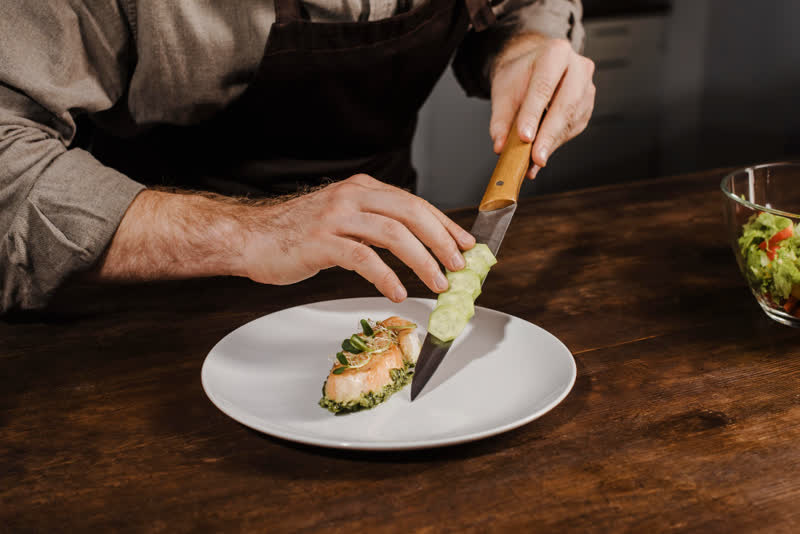
How to Improve Your Plating and Presentation Skills
The way food is presented on the plate can be just as impactful as its flavor. Plating and presentation play a significant role in how a meal is perceived, whether at home, in a restaurant, or for social media. Improving your plating skills can make your food more enticing, highlight its ingredients, and elevate the overall dining experience. Fortunately, there are simple techniques that anyone can use to enhance their presentation. One of the first steps is understanding the concept of balance. A well-plated dish should have a combination of colors, textures, and shapes that complement each other. Using a variety of ingredients not only improves flavor but also creates visual interest. For example, pairing bright vegetables with a neutral protein or garnishing with fresh herbs can add vibrancy to a plate. The choice of plate itself matters. The size, shape, and color of your dish can influence how the food looks. A plate that is too small can appear crowded, while a plate that is too large may make the portion seem insignificant. White or neutral-colored plates often work best because they allow the colors of the food to stand out, but experimenting with other tones can also create unique effects. Arrangement is key. Avoid simply placing food in the center of the plate. Instead, consider layering ingredients, creating height, or using asymmetrical placement to make the presentation more dynamic. Techniques like stacking vegetables, fanning slices of meat, or drizzling sauce in a controlled pattern can make a dish look professionally plated. Negative space, or the empty area around the food, is another important consideration. Leaving some space on the plate prevents it from looking cluttered and draws attention to the main components. Proper use of negative space can make a simple meal appear elegant and intentional. Garnishes should complement the flavors and appearance of the dish rather than dominate it. Fresh herbs, edible flowers, or a light sprinkle of spices can add color and texture, but they should be used thoughtfully. Always ensure garnishes are edible and relevant to the flavor profile of the meal. Finally, practice and observation are essential. Studying professional chefs, food photography, and culinary magazines can provide inspiration and teach composition techniques. Taking time to plate thoughtfully, even at home, builds skills over time and increases confidence in presentation. In conclusion, improving plating and presentation skills involves balance, color, arrangement, and attention to detail. By considering how ingredients interact visually and using space and garnishes effectively, anyone can elevate their cooking. A beautifully presented dish not only impresses the eye but also enhances the overall dining experience, making every meal feel special.

How to Cook Smarter, Not Harder
Cooking at home can sometimes feel overwhelming, especially when trying to prepare multiple dishes or complex meals. However, cooking smarter rather than harder can save time, reduce stress, and still result in delicious meals. By adopting efficient strategies and changing how you approach the kitchen, anyone can make cooking easier and more enjoyable. One of the first ways to cook smarter is to plan ahead. Meal planning allows you to organize your ingredients and schedule cooking tasks in advance. By creating a simple weekly menu and a shopping list, you can avoid last-minute decisions and reduce the chances of wasting ingredients. Planning also makes it easier to cook meals that can be prepared in batches, saving time throughout the week. Organization in the kitchen is another key factor. Keeping your workspace clean and arranging ingredients and tools before you start cooking prevents unnecessary movement and confusion. Using labeled containers and a tidy storage system allows you to quickly find what you need, which makes the cooking process faster and less stressful. Time management is essential for smarter cooking. Start by focusing on tasks that take the longest, such as roasting or simmering, and then move on to quicker tasks like chopping vegetables or preparing sauces. Multi-tasking effectively, such as cooking grains while sautéing vegetables, ensures that all components of a meal are ready simultaneously without rushing. Another important strategy is learning to use versatile ingredients. Foods like rice, pasta, beans, and frozen vegetables can be incorporated into many different dishes. Preparing these ingredients in advance or keeping them on hand allows you to quickly assemble meals without starting from scratch each time. Proteins like chicken, tofu, or fish can also be cooked in bulk and used in several meals, saving both time and effort. Having the appropriate kitchen tools can greatly simplify cooking and improve results. A sharp knife, sturdy cutting board, and reliable pots and pans reduce cooking time and effort. Small appliances, such as slow cookers, pressure cookers, or food processors, can also simplify tasks and allow you to focus on other aspects of the meal. Finally, embracing simple techniques and avoiding unnecessary complexity is crucial. You don’t always need elaborate recipes or dozens of ingredients to create satisfying meals. Focusing on high-quality basics, seasoning properly, and cooking efficiently ensures that meals are tasty without requiring excessive effort. By planning ahead, organizing your kitchen, managing time wisely, using versatile ingredients, and simplifying techniques, you can cook smarter, not harder. These strategies make daily cooking less stressful, save energy, and allow you to enjoy the process. Over time, cooking efficiently becomes a habit, turning home-prepared meals into a more rewarding and enjoyable experience.
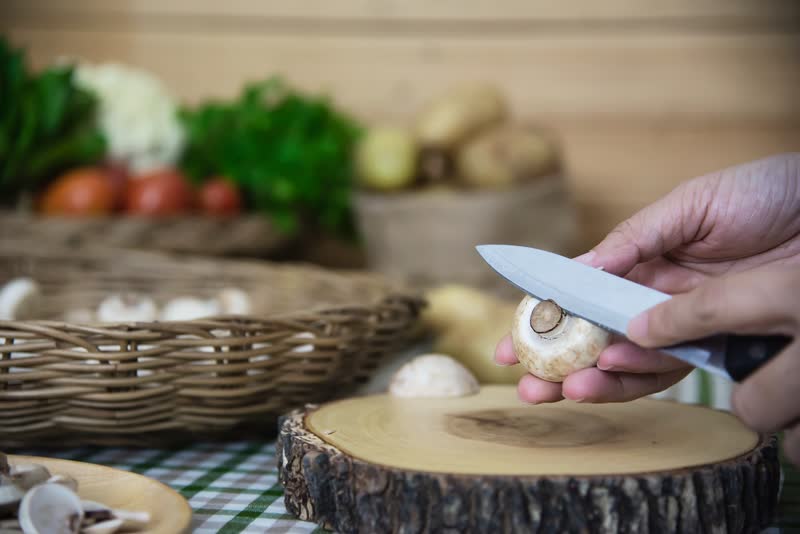
The Art of Proper Knife Skills: Cut Like a Pro
A sharp knife is one of the most powerful tools in the kitchen - but without proper technique, even the best knife can slow you down, waste ingredients, or create safety risks. Mastering knife skills not only improves efficiency, it also elevates the appearance and consistency of your dishes. Understanding cutting techniques, knife types, and hand positioning can transform your home cooking. Why Knife Skills Matter Precise cuts ensure even cooking, better texture, and a professional presentation. Uniform pieces cook at the same rate, avoiding undercooked or overcooked components. Proper technique also reduces the risk of accidents, improves speed, and helps maintain ingredient integrity, preserving both flavor and nutrition. Essential Knife Types Chef’s Knife: The essential all-purpose knife for everyday cutting, chopping, and slicing tasks. Paring Knife: Ideal for peeling, trimming, and small detailed work. Serrated Knife: Perfect for bread, tomatoes, and soft fruits. Utility Knife: Useful for mid-sized tasks when a chef’s knife is too large. Key Cutting Techniques Chopping: Fast, uniform cuts, often for vegetables. Maintain a rocking motion using the knife tip as a pivot. Dicing: Cut ingredients into even cubes for consistency in cooking and presentation. Julienne: Thin, matchstick-style cuts that create visually appealing textures in salads, stir-fries, or garnishes. Mincing: Very fine chopping, often for herbs, garlic, or aromatics, to release maximum flavor. Brunoise: Tiny uniform cubes, ideal for refined presentations or sauces. Proper Grip and Hand Position Holding your knife correctly increases control and safety. The recommended technique is the pinch grip, where your thumb and forefinger pinch the blade just above the handle while the other fingers wrap around it. Your non-dominant hand should use a claw grip to hold ingredients, tucking fingertips under to avoid cuts. Knife Maintenance Sharp knives cut more safely and cleanly, with regular honing maintaining the edge and periodic sharpening restoring it to optimal condition. Clean knives immediately after use and store them safely in a knife block, magnetic strip, or protective sheath to prevent damage. Tips for Practicing Knife Skills Practice on a variety of vegetables and fruits to gain control and speed. Focus on consistency—uniform cuts not only cook evenly but also enhance presentation. Start slowly to develop proper technique, then increase speed once comfortable. Use cutting boards with stable surfaces to prevent slipping. Mastering knife skills may take time, but the benefits are immediate. Faster prep, safer handling, and consistently beautiful ingredients make cooking more efficient and enjoyable. With the right knives, proper technique, and regular practice, any home cook can cut like a professional.
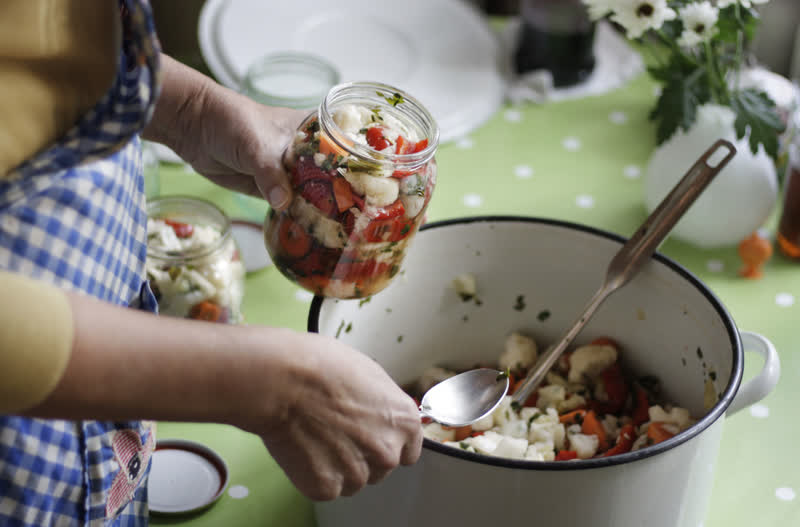
How to Rescue Overcooked or Undercooked Dishes
Even experienced home cooks encounter it - a dish that is overcooked, dry, or undercooked and uneven. While it can feel like a lost cause, understanding a few key techniques allows you to save meals, improve texture, and boost flavor—without starting from scratch. With the right strategies, you can turn mistakes into opportunities for creativity in the kitchen. 1. Fixing Overcooked Proteins Overcooked meat or poultry often ends up dry and tough. To rescue it: Shred or Slice Thinly: Cutting meat into smaller pieces makes it feel more tender and easier to eat. Add Moisture: Incorporate broths, sauces, or gravies to restore juiciness. Slow-simmering overcooked meat in a flavorful liquid can soften fibers and reintroduce moisture. Use it in Other Dishes: Overcooked proteins work well in casseroles, soups, stir-fries, tacos, or sandwiches. 2. Salvaging Undercooked Proteins Undercooked dishes, especially meats and poultry, need careful handling for safety and quality. Finish Cooking Gently: Use the oven, stovetop, or poaching method to cook evenly without drying out. Slice or Flatten for Faster Cooking: Thin cuts cook faster and more evenly than thick chunks, reducing the risk of overcooking while finishing the dish. 3. Reviving Overcooked Vegetables Vegetables can lose texture, color, and flavor when overcooked. To rescue them: Add Acid: A splash of lemon juice, vinegar, or tomato can brighten flavors. Incorporate Fat: Toss vegetables with olive oil, butter, or a creamy sauce to improve mouthfeel. Repurpose: Overcooked vegetables are perfect for soups, purees, sauces, or veggie patties. 4. Adjusting Undercooked Vegetables Quick Sauté or Steam: Small batches of undercooked vegetables can be finished quickly on the stovetop. Cut Smaller Pieces: Reduce cooking time by slicing vegetables thinner or into uniform shapes. Combine Cooking Methods: For example, par-cook vegetables in the microwave, then sear or roast for flavor and texture. 5. Saving Sauces and Soups Sauces and soups can become too thick, thin, or over-seasoned: Too Thick: Add broth, water, or milk gradually while whisking to restore the right consistency. Too Thin: Reduce gently over low heat to concentrate flavors. Over-Seasoned: Dilute with a neutral base (water, stock, or unsalted puree) and adjust aromatics for balance. 6. Timing and Temperature Tweaks Sometimes dishes fail because of uneven heat or timing. Using a thermometer, adjusting oven temperature, or finishing in a different cooking method can save both proteins and vegetables without compromising flavor. Mistakes in cooking are inevitable, but with the right knowledge, overcooked or undercooked dishes don’t have to go to waste. By adjusting moisture, texture, and cooking technique—and repurposing ingredients creatively—you can salvage meals, reduce food waste, and still serve delicious, satisfying dishes.
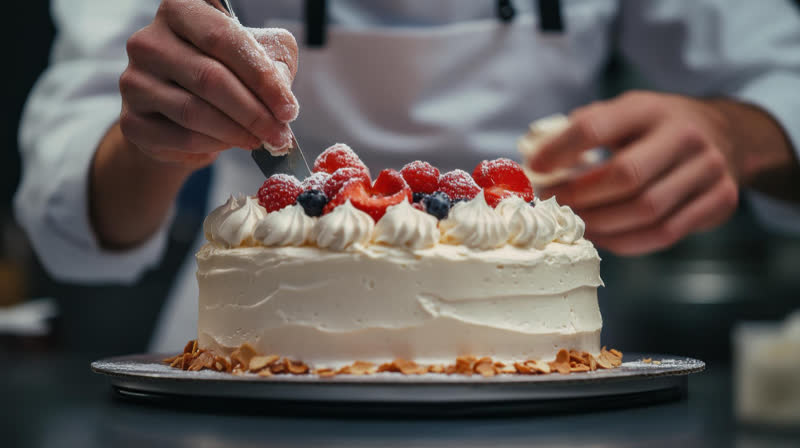
The Guide to Perfectly Baked Cakes Every Time
Baking a cake can seem intimidating, especially for beginners, but with the right approach and a few key strategies, it is possible to achieve consistently excellent results. A perfect cake is moist, tender, and evenly baked, with a pleasing texture and flavor. Understanding the fundamentals of baking, proper preparation, and attention to detail can make a significant difference. Begin by choosing high-quality ingredients, as they form the foundation of a successful cake. High-quality flour, fresh eggs, good butter, and pure vanilla extract can greatly enhance the flavor and texture of your cake. Accurate measurements are essential in baking because even small deviations can affect the outcome. Using a kitchen scale instead of relying solely on cups can improve consistency and help you replicate successful results. Proper preparation of the baking pan is also important. Greasing the pan and lining it with parchment paper ensures that the cake does not stick and maintains its shape. Some bakers prefer to lightly flour the pan after greasing to create a smooth surface and prevent edges from becoming too crisp. Choosing the correct pan size according to the recipe is essential, as using a pan that is too large or small can alter baking times and texture. Mixing techniques play a critical role in cake quality. Overmixing can lead to a dense, tough cake, while undermixing may leave uneven pockets of flour. Most recipes require careful folding of ingredients to incorporate air and create a light texture. Be sure to follow the specific instructions for creaming butter and sugar, combining wet and dry ingredients, and adding eggs gradually. Temperature control is another key factor. Preheating the oven ensures that the cake starts baking immediately at the correct temperature. Avoid opening the oven door too often, as this can cause the cake to collapse or bake unevenly. Using an oven thermometer can help verify that your oven maintains an accurate temperature, as many built-in thermostats are not precise. Baking time should be monitored closely. Testing the cake with a toothpick or cake tester near the end of the suggested baking period helps ensure it is done without overbaking. After taking the cake out of the oven, let it rest for a few minutes before carefully transferring it from the pan. Cooling on a wire rack prevents moisture from accumulating on the bottom and keeps the texture light. Finally, presentation and decoration can enhance the cake’s appeal. Simple dusting of powdered sugar, a layer of frosting, or fresh fruit can elevate even a basic cake. Taking care in presentation makes the cake more inviting and satisfying to enjoy. By carefully selecting ingredients, measuring accurately, preparing the pan properly, controlling mixing and temperature, and paying attention to baking time, anyone can bake a perfect cake consistently. With practice and patience, baking becomes an enjoyable and rewarding experience, producing delicious results every time.
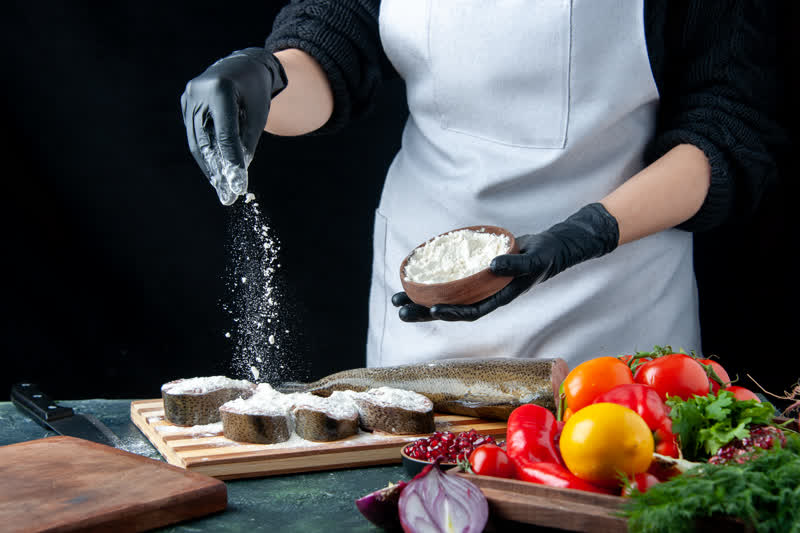
The Science of Salt: How to Season Like a Chef
Salt is more than just a basic seasoning - it is a tool that can transform a dish from bland to brilliant. Understanding the science behind salt, when to use it, and how to layer it properly can dramatically improve flavor, balance, and texture in your cooking. Chefs know that seasoning is as much about timing and technique as it is about quantity. Why Salt Matters Salt enhances natural flavors by reducing bitterness, amplifying sweetness, and creating depth. It also affects texture—drawing moisture from vegetables in a controlled way or helping proteins retain juiciness during cooking. The right amount of salt applied at the right time is crucial for both taste and appearance. Timing Your Salt Before Cooking: Salting proteins like meat or fish in advance helps season the interior while aiding moisture retention. Salting vegetables before roasting draws out water, intensifying flavor. During Cooking: Adding salt gradually during cooking allows flavors to develop naturally. This is particularly important in sauces, soups, and stews. Finishing Salt: A final pinch or sprinkle just before serving can brighten flavors and add texture, especially when using flaky salts like Maldon or fleur de sel. Choosing the Right Type of Salt Kosher Salt: Ideal for general cooking and seasoning, easy to pinch and control. Table Salt: Fine grains dissolve quickly, useful in baking or when precise measurements are required. Sea Salt: Adds subtle mineral flavors, often used as finishing salt. Flaky or Specialty Salts: Enhance texture and presentation when sprinkled over finished dishes. How Much Salt is Enough? Salt is powerful; too little leaves food flat, too much overwhelms flavors. A good rule of thumb is to season in layers and taste as you go. Start with a light base, adjust during cooking, and finish with a final taste test before serving. Layering Salt for Maximum Flavor Professional chefs rarely rely on a single application of salt. They season ingredients at multiple stages: Season proteins before cooking. Adjust seasoning while cooking sauces or soups. Finish the dish with a pinch of finishing salt for brightness and texture. Salt Beyond Taste Salt affects more than flavor—it can improve texture and appearance. For instance, salting vegetables before roasting helps them caramelize evenly, and brining meats enhances juiciness while creating a golden, flavorful crust during cooking. Mastering salt is about understanding its role in flavor, texture, and timing. By learning when and how to season, choosing the right type of salt, and layering it thoughtfully, home cooks can elevate everyday meals to chef-level dishes. With salt as a tool—not just an afterthought—your cooking will be consistently balanced, flavorful, and professional.
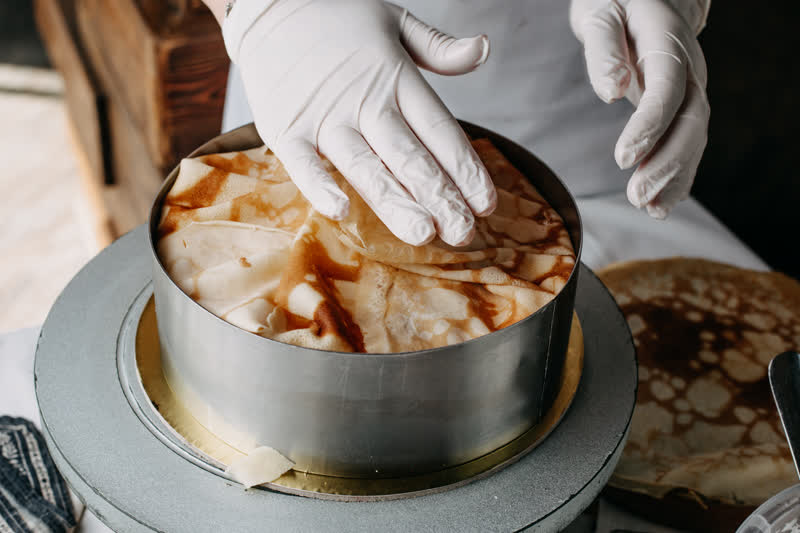
How to Achieve the Perfect Texture in Cakes and Pastries
Texture is what separates a good cake or pastry from an exceptional one. A perfectly tender crumb, a light, airy sponge, or a flaky, buttery pastry doesn’t happen by accident—it’s the result of understanding ingredients, mixing techniques, and baking methods. By mastering these factors, home bakers can consistently create desserts that look and feel professional. 1. Understand Your Ingredients Flour: Protein content affects structure. Cake flour creates a tender, soft crumb, while all-purpose flour provides more structure for sturdier pastries. Fat: Butter, shortening, or oil contributes to richness and tenderness. Cold butter in pastry produces flaky layers, while creamed butter in cakes traps air for lift. Sugar: Beyond sweetness, sugar tenderizes baked goods by slowing gluten development and adding moisture. Leavening Agents: Proper use of leavening agents ensures your baked goods rise evenly and develop a tender crumb. Correct ratios and freshness are essential for light, airy textures. 2. Master Mixing Techniques Overmixing or undermixing can ruin texture: Cakes: Cream butter and sugar to incorporate air for a light, fluffy crumb. Fold dry ingredients gently to avoid dense cakes. Pastries: Handle dough minimally to prevent gluten overdevelopment, which can make crusts tough instead of tender and flaky. Eggs: Whipping eggs or egg whites properly introduces air, contributing to volume and lightness in sponges and meringues. 3. Temperature and Timing Matter Ingredients: Room temperature eggs and butter blend more evenly, creating smoother batters and better rise. Oven: Preheat for consistent baking. Uneven temperatures can cause dense, undercooked centers or dry edges. Baking Time: Follow recipes closely, but test for doneness with a toothpick or cake tester to avoid overbaking, which dries out cakes and pastries. 4. Moisture Control Too Much Liquid: Overly wet batter produces dense cakes that lack proper lift. Measure carefully and adjust flour slightly if needed. Too Little Liquid: Produces dry or crumbly textures. Adding a touch of milk, cream, or yogurt can improve moisture and tenderness. 5. Layering Flavors and Textures Combine creamy fillings with crisp pastry layers for contrast. Use glazes, syrups, or soaking liquids sparingly to add moisture without making desserts soggy. Consider nuts, chocolate chips, or fruit for added texture that complements the base cake or pastry. 6. Resting and Cooling Allow pastries and cakes to cool properly on wire racks to prevent condensation, which can make crusts soggy or cakes collapse. Some pastries benefit from resting in the fridge, which helps layers set and flavors meld. Achieving the perfect texture is about precision, technique, and understanding how ingredients interact. By controlling mixing, temperature, moisture, and layering textures, home bakers can consistently produce cakes and pastries that are tender, flaky, and irresistible—just like those from a professional bakery.
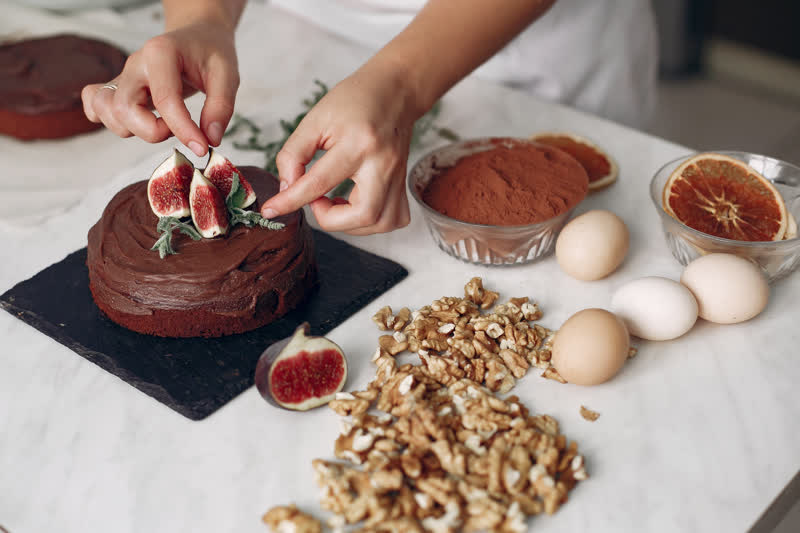
Tips for Decorating Cakes Like a Professional
Cake decoration is more than just a finishing touch - it is an opportunity to elevate a homemade dessert into something visually stunning and memorable. With the right techniques, tools, and a few insider tips, even home bakers can create professional-looking cakes without feeling overwhelmed. 1. Start with a Solid Foundation Ensure your cake layers are level by trimming domed tops. Cool cakes completely before frosting; warm layers can cause melting or uneven surfaces. Start with a crumb coat to catch stray crumbs and create a smooth foundation for your final frosting layer. 2. Invest in the Right Tools Offset Spatula: For smooth frosting and spreading. Bench Scraper: To create clean, sharp edges on frosted cakes. Piping Bags and Tips: Ideal for delicate patterns, borders, and lettering. Turntable: Makes frosting, smoothing, and decorating faster and more precise. 3. Master Basic Frosting Techniques Smooth Finish: Apply frosting evenly and use a bench scraper for clean edges. Piping: Start with simple borders and rosettes; practice on parchment first. Layering: Alternate frosting and cake layers evenly for balanced height and stability. 4. Play with Texture and Color Textures: Combine smooth frosting with piped designs, crushed nuts, or sprinkles. Colors: Use natural colorings, pastes, or gels. Limit palettes for a professional look and blend gradually for ombré effects. Contrast: Add fresh fruit, chocolate shards, or edible flowers for dynamic presentation. 5. Keep It Clean Wipe tools frequently to prevent smudges or streaks. Remove crumbs from the cake surface before frosting or decorating. Work in a clean, uncluttered space to avoid mistakes. 6. Practice Patience and Precision Professional-looking cakes rarely happen instantly. Take your time with each step—smoothing frosting, piping borders, and arranging toppings. Patience ensures every layer, swirl, and decoration looks deliberate and polished. 7. Experiment and Learn Don’t be afraid to try new techniques, textures, or edible decorations. Watching tutorials, practicing on small cakes, and experimenting with different tools builds skill and confidence over time. Decorating a cake like a professional is about preparation, precision, and creative choices. With a solid foundation, the right tools, and attention to detail, you can turn everyday cakes into impressive, restaurant-quality desserts. Consistent practice and experimentation make even complex designs achievable for home bakers.
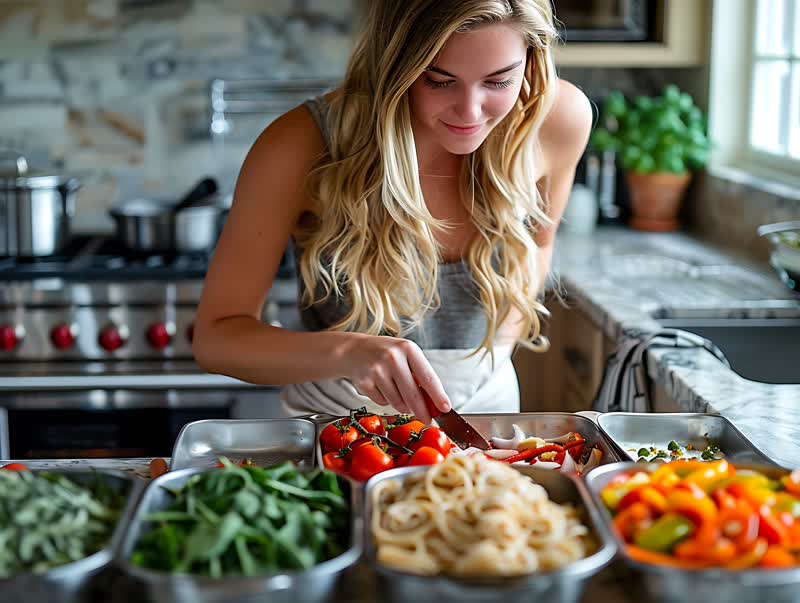
Turning Everyday Meals into Something Special
Even the simplest meals can feel extraordinary with a few thoughtful techniques. Transforming an everyday dinner into a dish that excites the senses isn’t about fancy ingredients or complicated recipes—it’s about paying attention to flavor, texture, presentation, and small touches that elevate the experience. 1. Focus on Flavor Layers Balance flavors: Savory, sweet, sour, bitter, and umami—combining these thoughtfully makes dishes more dynamic. Use acids wisely: Lemon juice, vinegar, or a splash of wine brightens flavors. Herbs and spices: Add fresh herbs at the end for freshness; infuse dried spices early for depth. 2. Upgrade Ingredients Strategically Swap plain butter for a compound butter with herbs or garlic. Use freshly grated cheese instead of pre-shredded for better flavor and texture. Choose seasonal vegetables or high-quality proteins for more pronounced taste. 3. Pay Attention to Texture Combine creamy, crispy, and tender elements for contrast. Roast, grill, or toast ingredients to add crunch. Finish with garnishes like seeds, nuts, or fresh herbs for extra bite and visual appeal. 4. Make Presentation Matter Plate food thoughtfully: stack, layer, or arrange ingredients deliberately. Add color contrast—bright vegetables or fresh greens can transform a plain dish. Use small garnishes, drizzles, or a sprinkle of spices for a polished look. 5. Mind the Aroma Smell is a huge part of taste. Toasting spices, browning proteins, or adding a finishing drizzle of flavored oil can make even everyday dishes feel indulgent. Aromatic touches make a meal memorable before the first bite. 6. Don’t Overcomplicate Turning a meal into something special doesn’t require hours in the kitchen. Simple additions—like a sprinkle of finishing salt, a dash of citrus, or a few fresh herbs—can elevate a dish instantly. The key is intention, balance, and awareness of flavor and texture. With careful attention to flavor, texture, aroma, and presentation, everyday meals can become memorable experiences. Small upgrades, thoughtful plating, and strategic seasoning transform ordinary dishes into something special—making even a weeknight dinner feel like a celebration.
How to Make Your Leftovers Taste Brand New
Leftovers do not have to be boring or repetitive. With a few smart techniques, you can transform yesterday’s meal into something that feels fresh, exciting, and even gourmet. Maximizing flavor, texture, and presentation can make your leftovers just as enjoyable—if not more—than the original dish. 1. Reheat Strategically Oven or stovetop: Best for proteins and baked dishes, preserving texture better than a microwave. Microwave with care: Cover food loosely to retain moisture, stir halfway, and avoid overheating. Steam for vegetables: Keeps them vibrant and prevents mushiness. 2. Add Fresh Ingredients Fresh herbs like parsley, cilantro, or basil immediately lift flavor. Slices of raw vegetables or a handful of greens add crunch and freshness. Citrus juice or zest can reinvigorate sauces and proteins. 3. Layer in Flavor Add a dash of spice or hot sauce to soups, stews, or pasta. Stir in a bit of cheese, cream, or yogurt for richness. Incorporate condiments like mustard, soy sauce, or vinaigrette for depth. 4. Change the Format Rice or pasta: Turn into fried rice, casseroles, or stir-fries. Proteins: Slice, shred, or cube meat for tacos, sandwiches, or salads. Vegetables: Blend into soups, frittatas, or veggie patties. 5. Pay Attention to Texture Toasted nuts or seeds for crunch. Croutons, crispy tortillas, or puff pastry for crispiness. A drizzle of oil or a squeeze of lemon to refresh and balance. 6. Mind the Presentation Arrange food neatly and add garnishes like fresh herbs, microgreens, or a swirl of sauce. Serve in small bowls or plates rather than reheating in the original container—it makes a big psychological difference. With these strategies, leftovers can feel brand new, tasty, and satisfying. By reheating carefully, adding fresh ingredients, layering flavors, changing formats, and paying attention to texture and presentation, you can turn yesterday’s meals into exciting, flavorful dishes—reducing waste while enjoying every bite.